---
license: other
license_name: minimax-h3-community-license-agreement
license_link: https://huggingface.co/MiniMaxAI/MiniMax-H3/blob/main/LICENSE
base_model:
- MiniMaxAI/MiniMax-H3
pipeline_tag: text-to-video
library_name: diffusers
tags:
- audio-video
- minimax-h3
- turbo
- comfyui
---
MiniMax-H3-Turbo

Fixed-step MiniMax-H3 checkpoints for text-to-video with audio and first-frame-to-video with audio. This repository contains three variants:
- `turbo-4step/`: four-step LoRA with fused video and audio output projections.
- `turbo-8step/`: eight denoising steps.
- `turbo-6step/`: six denoising steps.
The 6- and 8-step variants store a complete Diffusers-format transformer. The
4-step variant stores a compact adapter for the official transformer, including
a backbone LoRA and fused video/audio output projections. The demo downloads
the remaining components from `MiniMaxAI/MiniMax-H3`. The output is one MP4
containing H.264 video and AAC audio; no separate WAV is written.
## Interactive Demo
[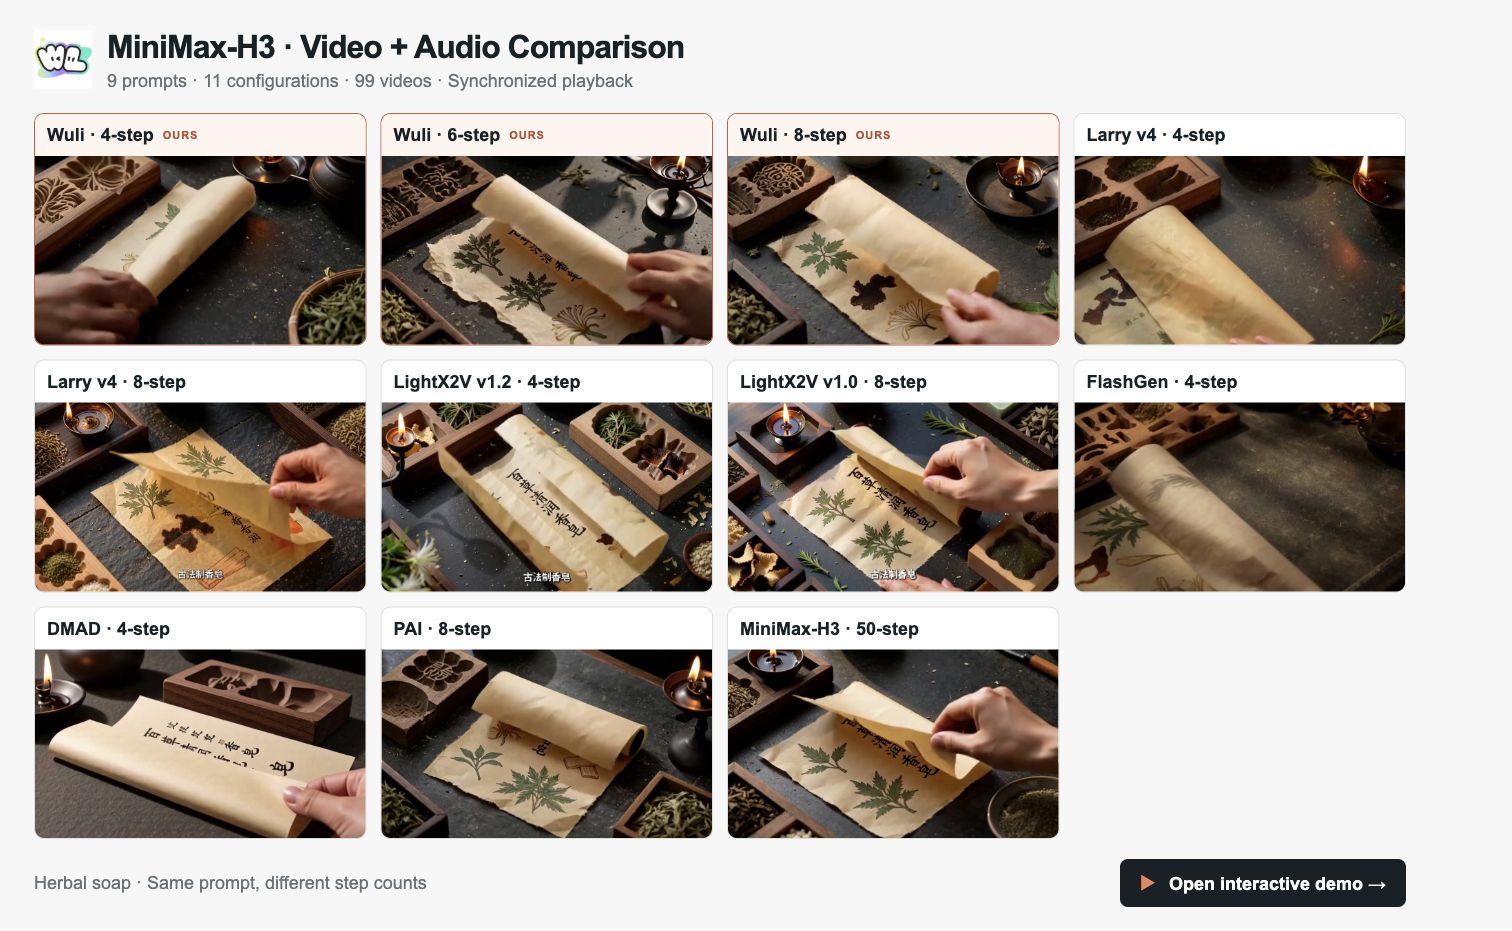](https://cdn.wuli.art/image/minimax-h3-comparison-20261009-0ff4412f/index.html)
[**Explore the MiniMax-H3 video comparison demo →**](https://cdn.wuli.art/image/minimax-h3-comparison-20261009-0ff4412f/index.html)
Compare **Wuli at 4, 6 and 8 steps** with Larry v4, LightX2V, FlashGen, DMAD, PAI and the original MiniMax-H3 at 50 steps. The demo includes **9 prompts, 11 configurations and 99 videos**, with synchronized playback, step-count filters, side-by-side comparisons and selectable audio.
## ComfyUI
Use the [MiniMax H3 Turbo ComfyUI node pack](https://github.com/wuli-art/MiniMax-H3-Turbo-ComfyUI) to generate video and audio with **4, 6, or 8 steps** and save them together as one MP4.
### 1. Install the nodes
Use a local ComfyUI installation with CUDA-enabled PyTorch. Clone the node pack into `ComfyUI/custom_nodes/` and install its dependencies with the **same Python environment that runs ComfyUI**:
```bash
cd /path/to/ComfyUI/custom_nodes
git clone https://github.com/wuli-art/MiniMax-H3-Turbo-ComfyUI.git
cd MiniMax-H3-Turbo-ComfyUI
python -m pip install -r requirements.txt
```
For Windows Portable, run the dependency command from the `ComfyUI_windows_portable` directory using its embedded Python:
```powershell
.\python_embeded\python.exe -m pip install -r .\ComfyUI\custom_nodes\MiniMax-H3-Turbo-ComfyUI\requirements.txt
```
Restart ComfyUI. The node pack requires `diffusers==0.40.0`, `transformers>=4.57.0`, and `peft>=0.17.0`; its `requirements.txt` installs the required packages. When updating an existing installation, install the requirements again before restarting.
### 2. Load a workflow
Download a workflow JSON below and drag it into ComfyUI:
| Variant | Text-to-video workflow | Selection |
| --- | --- | --- |
| 4 steps | [t2va_4step.json](https://raw.githubusercontent.com/wuli-art/MiniMax-H3-Turbo-ComfyUI/main/example_workflows/t2va_4step.json) | `steps = 4` |
| 6 steps | [t2va_8step.json](https://raw.githubusercontent.com/wuli-art/MiniMax-H3-Turbo-ComfyUI/main/example_workflows/t2va_8step.json) | Change `steps` to `6` |
| 8 steps | [t2va_8step.json](https://raw.githubusercontent.com/wuli-art/MiniMax-H3-Turbo-ComfyUI/main/example_workflows/t2va_8step.json) | `steps = 8` |
The workflows connect **MiniMax H3 Turbo Generate** to **MiniMax H3 Turbo Save MP4**. The default generation settings are `seed = 42`, `num_frames = 124`, `height = 768`, and `width = 1344`.
### 3. Generate a video with audio
1. Select `steps` and enter your scene and desired sound in `prompt`.
2. Leave `model_root` empty for automatic downloads. Keep `components_root` set to `MiniMaxAI/MiniMax-H3`.
3. For text-to-video, leave `first_frame` and `last_frame` disconnected.
4. Run the workflow. The first run downloads and loads the selected Turbo weights and official components. The save node writes a 24 fps H.264/AAC MP4 to ComfyUI's output directory.
For frame-conditioned generation, use [fl2va_4step.json](https://raw.githubusercontent.com/wuli-art/MiniMax-H3-Turbo-ComfyUI/main/example_workflows/fl2va_4step.json) or [fl2va_8step.json](https://raw.githubusercontent.com/wuli-art/MiniMax-H3-Turbo-ComfyUI/main/example_workflows/fl2va_8step.json). Select your image in **Load Image** and connect it to `first_frame`; connect a second **Load Image** node to `last_frame` when a final frame is also provided. For 6 steps, use the 8-step example and change `steps` to `6`.
See the [node pack README](https://github.com/wuli-art/MiniMax-H3-Turbo-ComfyUI#readme) for installation and usage details, or [open an issue](https://github.com/wuli-art/MiniMax-H3-Turbo-ComfyUI/issues) for ComfyUI-specific problems.
## Requirements
The demo was tested with Diffusers 0.40.0 and huggingface_hub 1.27.0. Install a CUDA-enabled PyTorch build compatible with your driver, then install the remaining packages. Only these two versions are pinned:
```bash
pip install "diffusers==0.40.0" "huggingface_hub==1.27.0" transformers accelerate peft safetensors av
```
The first run downloads the selected Turbo weights from
`Wuli-art/MiniMax-H3-Turbo` and the required base components from
`MiniMaxAI/MiniMax-H3`. The 4-step variant also uses the official transformer;
the 6- and 8-step variants replace it with their complete transformer.
## Text-to-video with audio
```bash
python run_fl2va.py --steps 8 --prompt "A paper airplane glides through a bright classroom." --output output.mp4
```
Use `--steps 4` to select the compact four-step adapter:
```bash
python run_fl2va.py --steps 4 --prompt "A paper airplane glides through a bright classroom." --output output.mp4
```
## First-frame-to-video with audio
```bash
python run_fl2va.py --steps 6 --image first_frame.png --height 768 --width 1344 --prompt "The scene in the first frame comes to life." --output output.mp4
```
`--steps` selects `turbo-4step/`, `turbo-6step/`, or `turbo-8step/`; it
defaults to 8. Use `--seed` and `--num-frames` to control the request.
`--last-image` is available when a final frame is also provided. `--height`
and `--width` must be passed together when an exact canvas is needed.
`--disable-cudnn` is an optional workaround for systems reporting
`CUDNN_STATUS_SUBLIBRARY_LOADING_FAILED`; leave it off on normal installations.
With `--model`, pass a local `turbo-6step/` or `turbo-8step/` directory for
the full variants. For four steps, pass either the adapter safetensors file,
its containing `turbo-4step/` directory, or the repository root containing
that directory.
## ModelScope mirror
To use the private `Wuli-Art/MiniMax-H3-Turbo` mirror instead of downloading its transformer from Hugging Face, install `modelscope_hub`, authenticate, and download only the selected variant:
```bash
pip install modelscope_hub
ms-hub login
ms-hub download Wuli-Art/MiniMax-H3-Turbo --include "turbo-8step/*" --local-dir MiniMax-H3-Turbo
python run_fl2va.py --steps 8 --model MiniMax-H3-Turbo/turbo-8step --prompt "A paper airplane glides through a bright classroom." --output output.mp4
```
For four or six steps, replace `8` with `4` or `6` in the folder name and
`--steps` argument. The demo still downloads the other components from
`MiniMaxAI/MiniMax-H3` on Hugging Face.
## Acknowledgement
We thank **Alibaba RTP-Compression Team**, **Alibaba Wuli Team**, **Bai Jiang**, and **Xiao Feng** for their support and contributions.