| # Text Classification |
|
|
| Training a text classification model with AutoTrain is super-easy |
| proper format and then with just a few clicks, your state-of-the-art model will be ready to |
| be used in production. |
|
|
| ## Data Format |
|
|
| Let's train a model for classifying the sentiment of a movie review. The data should be |
| in the following CSV format: |
|
|
| ```csv |
| review,sentiment |
| "this movie is great",positive |
| "this movie is bad",negative |
| . |
| . |
| . |
| ``` |
|
|
| As you can see, we have two columns in the CSV file. One column is the text and the other |
| is the label. The label can be any string. In this example, we have two labels: `positive` |
| and `negative`. You can have as many labels as you want. |
|
|
| If your CSV is huge, you can divide it into multiple CSV files and upload them separately. |
| Please make sure that the column names are the same in all CSV files. |
|
|
| One way to divide the CSV file using pandas is as follows: |
|
|
| ```python |
| import pandas as pd |
|
|
| # Set the chunk size |
| chunk_size = 1000 |
| i = 1 |
|
|
| # Open the CSV file and read it in chunks |
| for chunk in pd.read_csv('example.csv', chunksize=chunk_size): |
| # Save each chunk to a new file |
| chunk.to_csv(f'chunk_{i}.csv', index=False) |
| i += 1 |
| ``` |
|
|
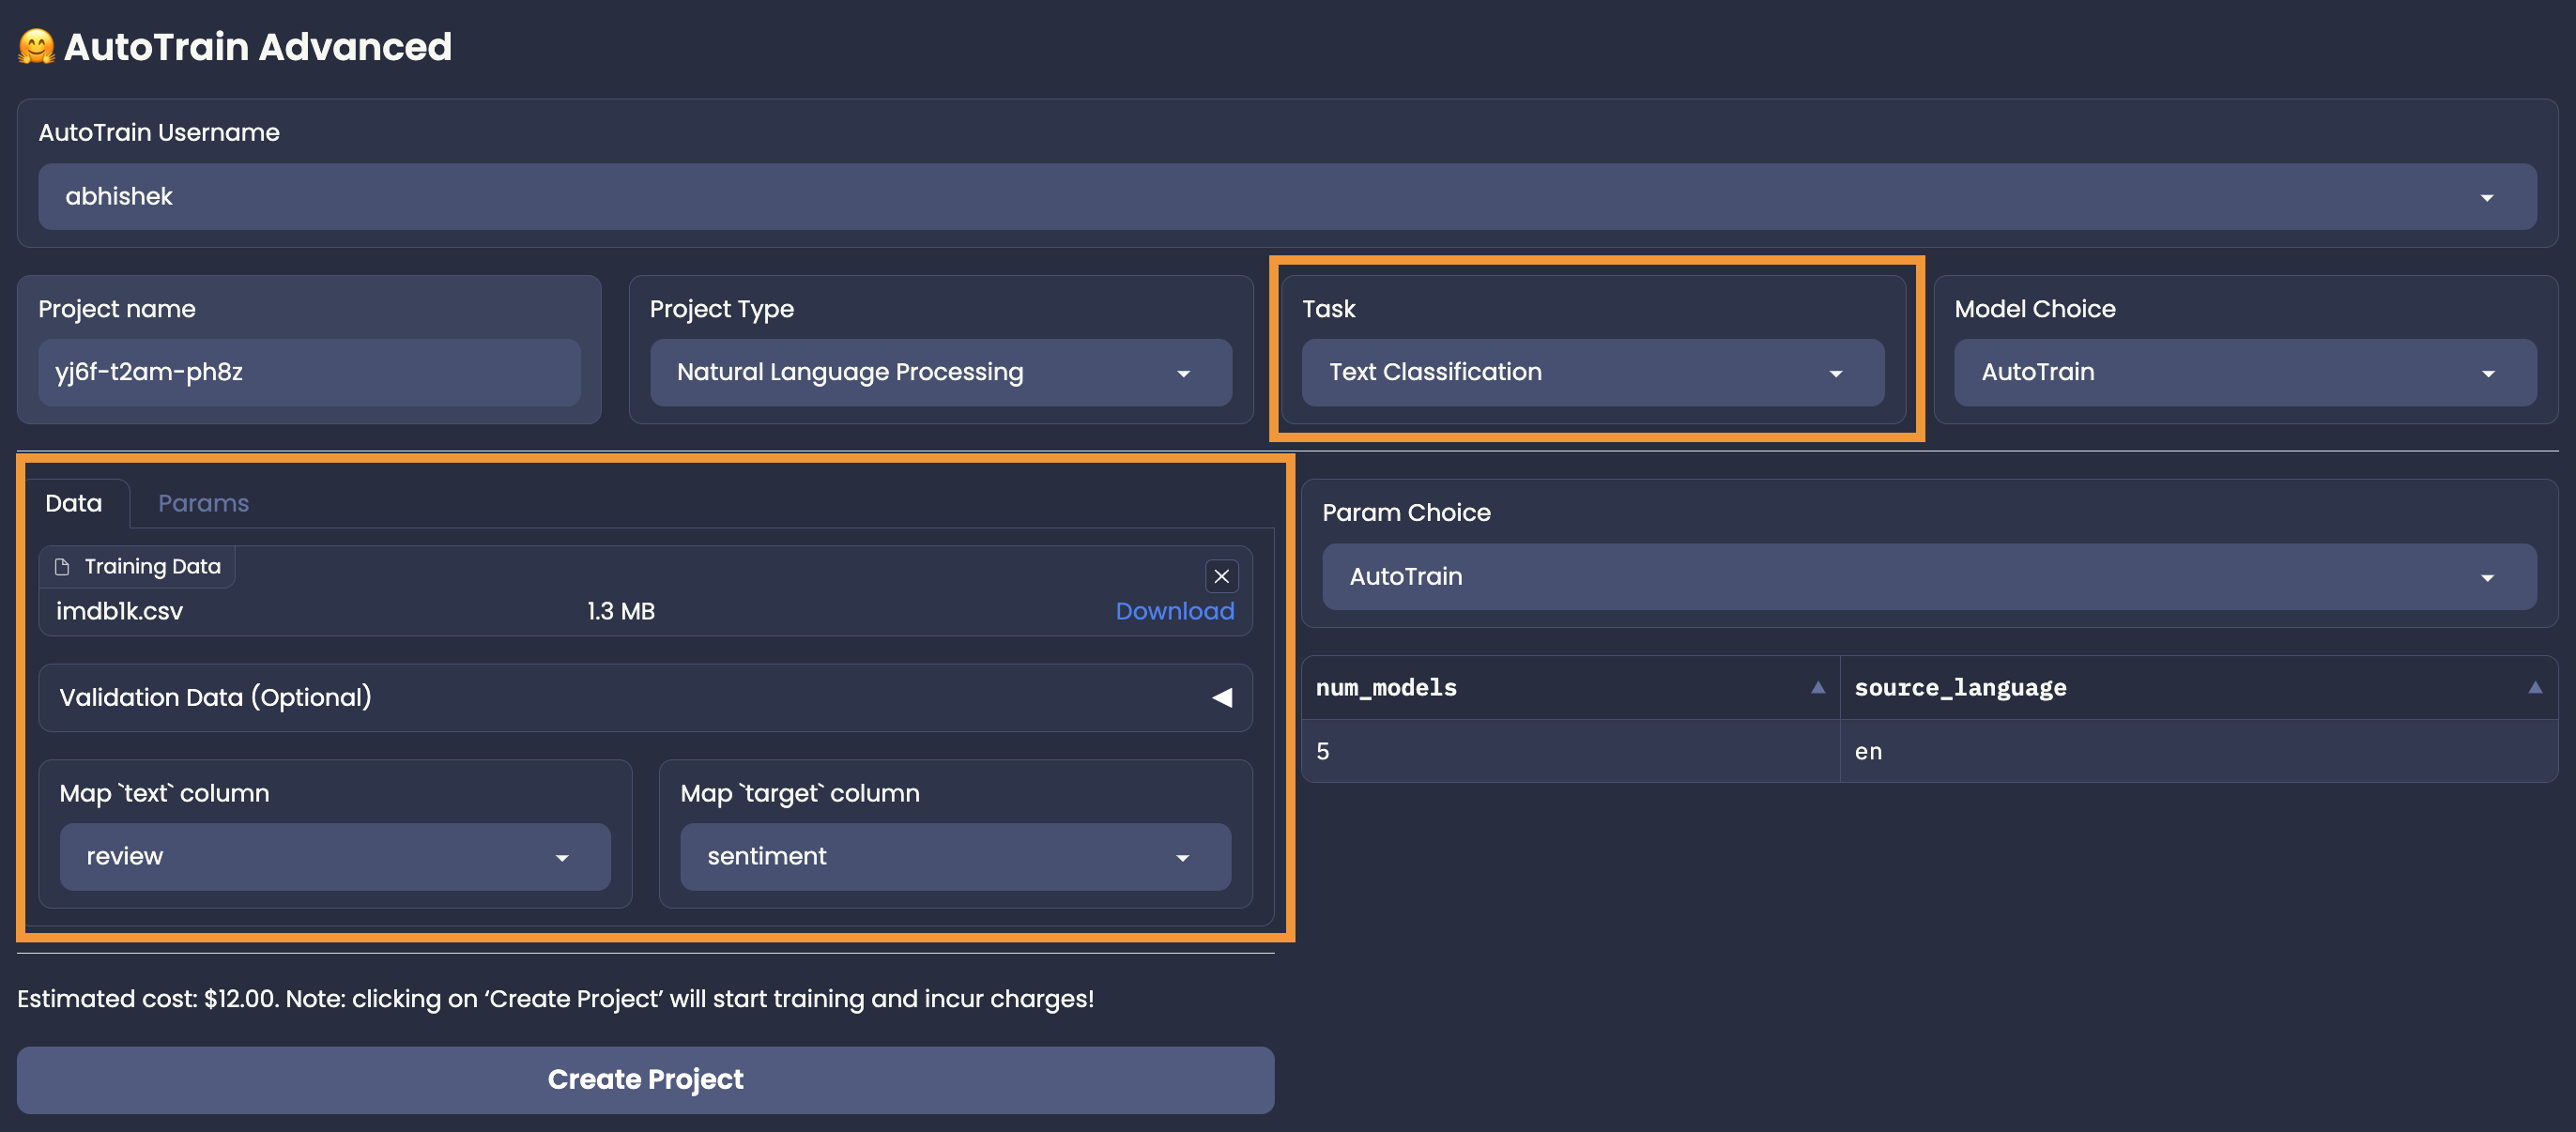
| Once the data has been uploaded, you have to select the proper column mapping |
|
|
| ## Column Mapping |
|
|
|  |
|
|
| In our example, the text column is called `review` and the label column is called `sentiment`. |
| Thus, we have to select `review` for the text column and `sentiment` for the label column. |
| Please note that, if column mapping is not done correctly, the training will fail. |
|
|
|
|
| ## Training |
|
|
| Once you have uploaded the data, selected the column mapping, and set the hyperparameters (AutoTrain or Manual mode), you can start the training. |
| To start the training, please confirm the estimated cost and click on the `Create Project` button. |
|
|
|
|
| |