
Diffusers documentation
潜在一貫性モデル
潜在一貫性モデル

Latent Consistency Models (LCM) は、Simian Luo、Yiqin Tan、Longbo Huang、Jian Li、Hang Zhao による Latent Consistency Models: Synthesizing High-Resolution Images with Few-Step Inference で提案されました。
本論文の抄録は以下の通りです。
潜在拡散モデル(LDM)は、高解像度画像の合成において目覚ましい成果を上げています。しかし、反復的なサンプリングプロセスは計算負荷が大きく、生成が遅くなるという問題があります。Consistency Models(song et al.)に着想を得て、私たちはLatent Consistency Models(LCM)を提案しました。これにより、Stable Diffusion(rombach et al)を含む任意の事前学習済みLDMにおいて、最小限のステップ数で高速な推論が可能になります。誘導付き逆拡散プロセスを拡張確率流ODE(PF-ODE)の解として捉え、LCMは潜在空間においてそのようなODEの解を直接予測するように設計されています。これにより、多数の反復の必要性を軽減し、高速かつ高忠実度のサンプリングを可能にします。事前学習済みclassifier-free guided拡散モデルから効率的に蒸留されたLCMは、高品質な768 x 768の2〜4ステップ推論を実現し、学習にはわずか32 A100 GPU時間しかかかりません。さらに、カスタマイズされた画像データセットでのLCMのファインチューニングに特化した新手法であるLatent Consistency Fine-tuning(LCF)を導入しました。LAION-5B-Aestheticsデータセットでの評価により、LCMは少数ステップの推論で最先端のテキストから画像への生成性能を達成することが示されました。プロジェクトページ: this https URL。
SimianLuo/LCM_Dreamshaper_v7 チェックポイントのデモは、こちらで確認できます。
パイプラインは、luosiallen、nagolinc、dg845 によって貢献されました。
LCMおよびLCM-LoRAは、Stable Diffusion v1.5、Stable Diffusion XL、およびSSD-1Bモデルで利用可能です。これらのチェックポイントは、Latent Consistencyコレクションで確認できます。
テキストから画像へ
LCMを使用するには、サポートされているモデルのLCMチェックポイントをUNet2DConditionModelに読み込み、スケジューラーをLCMSchedulerに置き換える必要があります。その後、パイプラインを通常どおり使用し、テキストプロンプトを渡すだけで、わずか4ステップで画像を生成できます。
LCMを使用する際に注意すべき点として、以下の2点があります。
- 通常、パイプライン内部では、classifier-free guidanceのためにバッチサイズが2倍になります。しかし、LCMはguidance embeddingsを用いてguidanceを適用するため、バッチサイズの2倍化が不要であり、推論が高速になります。その一方で、LCMではnegative promptsが機能しません。これは、negative promptsがdenoisingプロセスに何の影響も与えないためです。
guidance_scaleの理想的な範囲は[3., 13.]です。これはUNetがその範囲で学習されているためです。ただし、guidance_scaleを1.0に設定して無効にしても、ほとんどのケースで効果的です。
from diffusers import StableDiffusionXLPipeline, UNet2DConditionModel, LCMScheduler
import torch

unet = UNet2DConditionModel.from_pretrained(
    "latent-consistency/lcm-sdxl",
    dtype=torch.float16,
    variant="fp16",
)
pipe = StableDiffusionXLPipeline.from_pretrained(
    "stabilityai/stable-diffusion-xl-base-1.0", unet=unet, dtype=torch.float16, variant="fp16",
).to("cuda")  # or "mps", "xpu", "cpu"
pipe.scheduler = LCMScheduler.from_config(pipe.scheduler.config)

prompt = "Self-portrait oil painting, a beautiful cyborg with golden hair, 8k"
generator = torch.manual_seed(0)
image = pipe(
    prompt=prompt, num_inference_steps=4, generator=generator, guidance_scale=8.0
).images[0]
image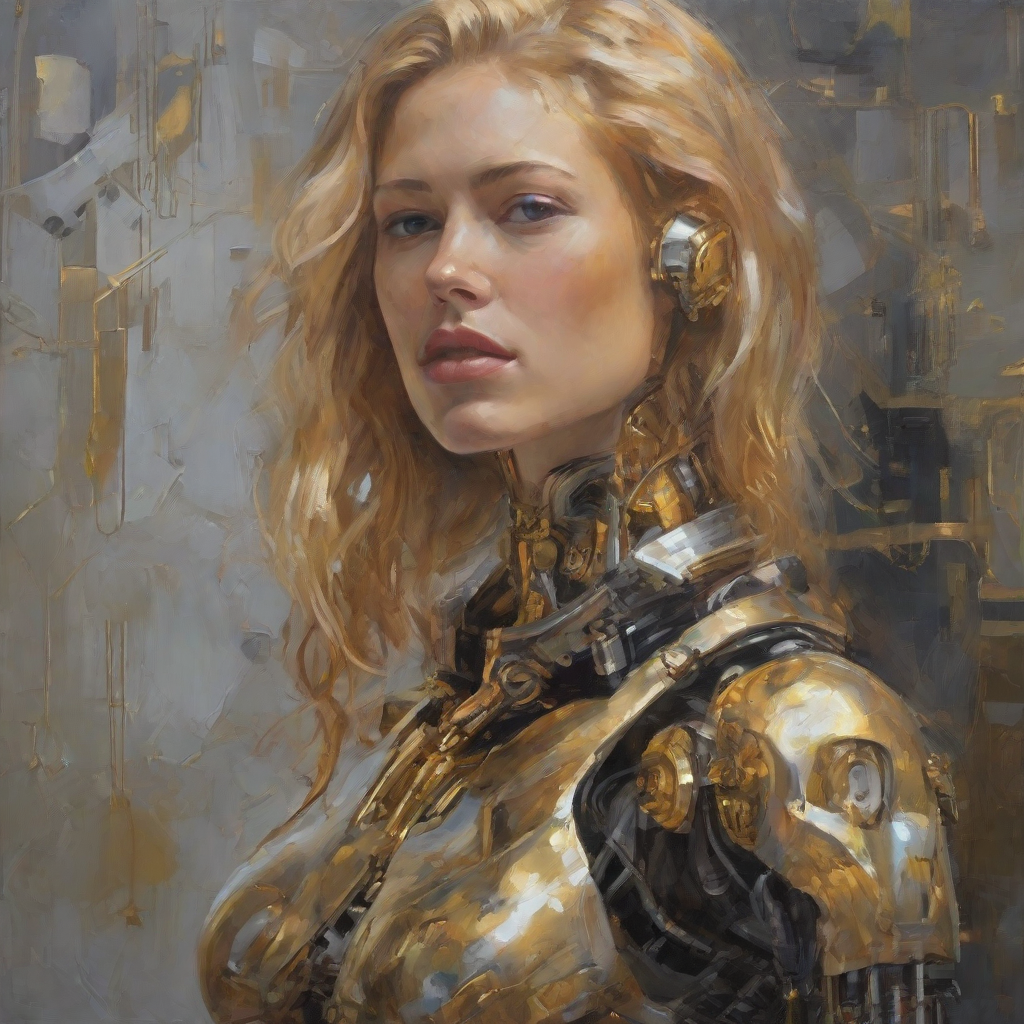
LCM-LoRAを使用するには、スケジューラーをLCMSchedulerに置き換え、load_lora_weights()メソッドでLCM-LoRAの重みを読み込む必要があります。その後、パイプラインを通常通り使用し、テキストプロンプトを渡すだけで、わずか4ステップで画像を生成できます。
LCM-LoRAを使用する際に注意すべき点はいくつかあります。
- 通常、パイプライン内部では、classifier-free guidanceのためにバッチサイズが2倍になります。しかし、LCMはguidance embeddingsを用いてguidanceを適用するため、バッチサイズの2倍化が不要であり、推論が高速になります。その一方で、LCMではnegative promptsが機能しません。これは、negative promptsがdenoisingプロセスに何の影響も与えないためです。
- LCM-LoRA と guidance を併用することは可能ですが、
guidance_scaleの値が高い場合、生成画像にアーティファクトが発生する原因となるため、非常に敏感です。最適な値は [1.0, 2.0] の間であることが確認されています。 - stabilityai/stable-diffusion-xl-base-1.0 を、任意のファインチューニング済みモデルに置き換えてください。例えば、animagine-xl チェックポイントを使用して、SDXL でアニメ画像を生成してみてください。
import torch
from diffusers import DiffusionPipeline, LCMScheduler

pipe = DiffusionPipeline.from_pretrained(
    "stabilityai/stable-diffusion-xl-base-1.0",
    variant="fp16",
    dtype=torch.float16
).to("cuda")  # or "mps", "xpu", "cpu"
pipe.scheduler = LCMScheduler.from_config(pipe.scheduler.config)
pipe.load_lora_weights("latent-consistency/lcm-lora-sdxl")

prompt = "Self-portrait oil painting, a beautiful cyborg with golden hair, 8k"
generator = torch.manual_seed(42)
image = pipe(
    prompt=prompt, num_inference_steps=4, generator=generator, guidance_scale=1.0
).images[0]
image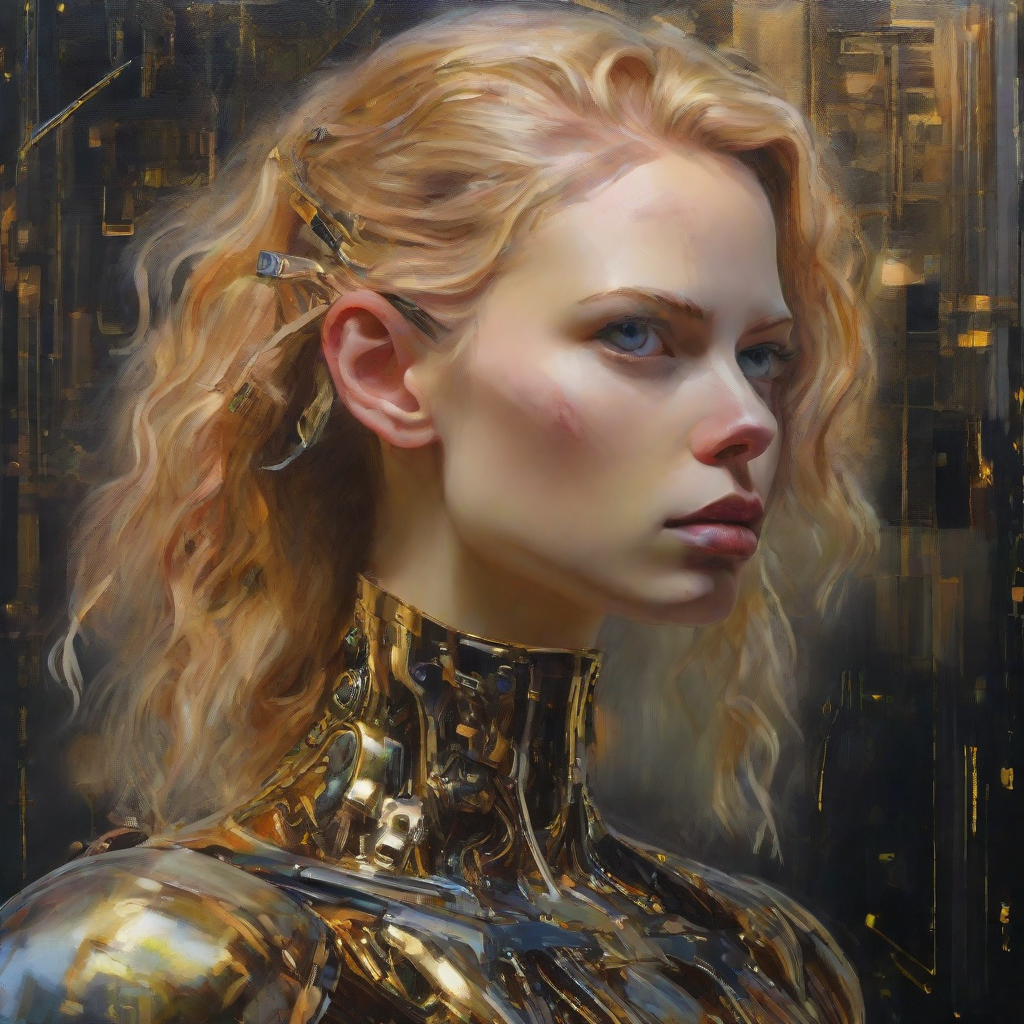
画像から画像へ
画像から画像への生成にLCMを使用するには、サポートされているモデルのLCMチェックポイントをUNet2DConditionModelに読み込み、スケジューラーをLCMSchedulerに置き換える必要があります。その後、パイプラインを通常どおり使用し、テキストプロンプトと初期画像を渡すことで、わずか4ステップで画像を生成できます。
num_inference_steps、strength、guidance_scaleの異なる値を試行錯誤し、最適な結果を得てください。
import torch
from diffusers import AutoPipelineForImage2Image, UNet2DConditionModel, LCMScheduler
from diffusers.utils import load_image

unet = UNet2DConditionModel.from_pretrained(
    "SimianLuo/LCM_Dreamshaper_v7",
    subfolder="unet",
    dtype=torch.float16,
)

pipe = AutoPipelineForImage2Image.from_pretrained(
    "Lykon/dreamshaper-7",
    unet=unet,
    dtype=torch.float16,
    variant="fp16",
).to("cuda")  # or "mps", "xpu", "cpu"
pipe.scheduler = LCMScheduler.from_config(pipe.scheduler.config)

init_image = load_image("https://huggingface.co/datasets/huggingface/documentation-images/resolve/main/diffusers/img2img-init.png")
prompt = "Astronauts in a jungle, cold color palette, muted colors, detailed, 8k"
generator = torch.manual_seed(0)
image = pipe(
    prompt,
    image=init_image,
    num_inference_steps=4,
    guidance_scale=7.5,
    strength=0.5,
    generator=generator
).images[0]
image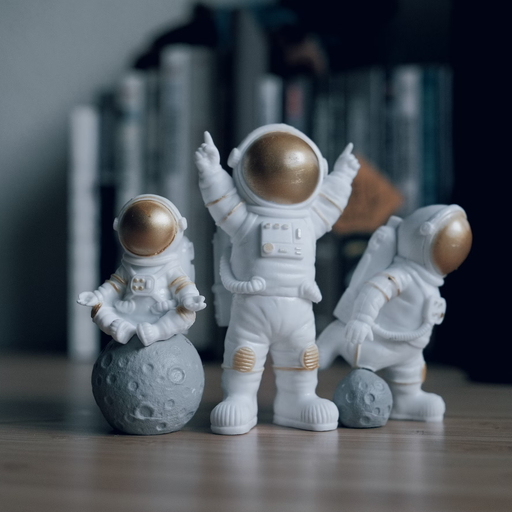

image-to-image で LCM-LoRA を使用するには、スケジューラーを LCMScheduler に置き換え、load_lora_weights() メソッドで LCM-LoRA の重みを読み込む必要があります。その後、パイプラインを通常どおり使用し、テキストプロンプトと初期画像を渡すことで、わずか 4 ステップで画像を生成できます。
num_inference_steps、strength、guidance_scaleの異なる値を試行錯誤し、最適な結果を得てください。
import torch
from diffusers import AutoPipelineForImage2Image, LCMScheduler
from diffusers.utils import make_image_grid, load_image

pipe = AutoPipelineForImage2Image.from_pretrained(
    "Lykon/dreamshaper-7",
    dtype=torch.float16,
    variant="fp16",
).to("cuda")  # or "mps", "xpu", "cpu"

pipe.scheduler = LCMScheduler.from_config(pipe.scheduler.config)

pipe.load_lora_weights("latent-consistency/lcm-lora-sdv1-5")

init_image = load_image("https://huggingface.co/datasets/huggingface/documentation-images/resolve/main/diffusers/img2img-init.png")
prompt = "Astronauts in a jungle, cold color palette, muted colors, detailed, 8k"

generator = torch.manual_seed(0)
image = pipe(
    prompt,
    image=init_image,
    num_inference_steps=4,
    guidance_scale=1,
    strength=0.6,
    generator=generator
).images[0]
image 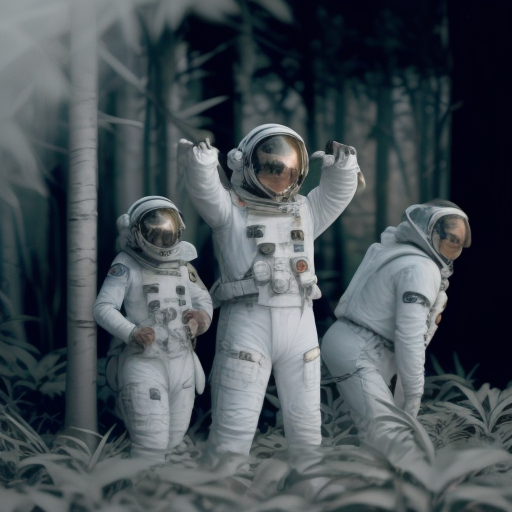
インペインティング
インペインティングにLCM-LoRAを使用するには、スケジューラーをLCMSchedulerに置き換え、load_lora_weights()メソッドでLCM-LoRAの重みを読み込む必要があります。その後、パイプラインを通常通り使用し、テキストプロンプト、初期画像、マスク画像を渡すことで、わずか4ステップで画像を生成できます。
import torch
from diffusers import AutoPipelineForInpainting, LCMScheduler
from diffusers.utils import load_image, make_image_grid

pipe = AutoPipelineForInpainting.from_pretrained(
    "stable-diffusion-v1-5/stable-diffusion-inpainting",
    dtype=torch.float16,
    variant="fp16",
).to("cuda")  # or "mps", "xpu", "cpu"

pipe.scheduler = LCMScheduler.from_config(pipe.scheduler.config)

pipe.load_lora_weights("latent-consistency/lcm-lora-sdv1-5")

init_image = load_image("https://huggingface.co/datasets/huggingface/documentation-images/resolve/main/diffusers/inpaint.png")
mask_image = load_image("https://huggingface.co/datasets/huggingface/documentation-images/resolve/main/diffusers/inpaint_mask.png")

prompt = "concept art digital painting of an elven castle, inspired by lord of the rings, highly detailed, 8k"
generator = torch.manual_seed(0)
image = pipe(
    prompt=prompt,
    image=init_image,
    mask_image=mask_image,
    generator=generator,
    num_inference_steps=4,
    guidance_scale=4,
).images[0]
image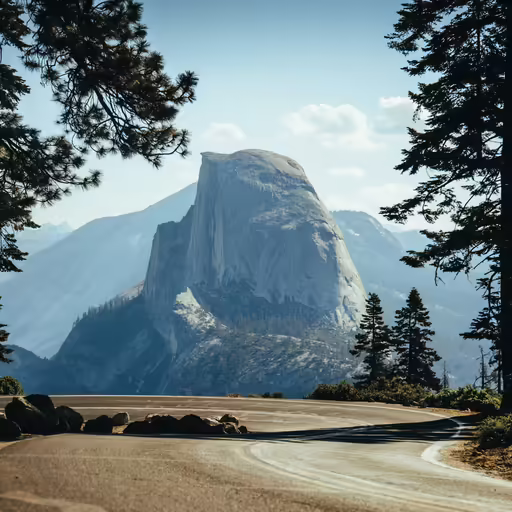

アダプター
LCMは、LoRA、ControlNet、T2I-Adapter、AnimateDiffなどのアダプターと互換性があります。LCMの高速性をこれらのアダプターに適用することで、特定のスタイルで画像を生成したり、canny画像などの別の入力に基づいてモデルを条件付けたりできます。
LoRA
LoRAアダプターは、わずか数枚の画像から新しいスタイルを学習するために迅速にファインチューニングでき、事前学習済みモデルに組み込むことで、そのスタイルで画像を生成できます。
サポート対象のモデルのLCMチェックポイントをUNet2DConditionModelに読み込み、スケジューラーをLCMSchedulerに置き換えます。その後、load_lora_weights()メソッドを使用してLoRAの重みをLCMに読み込み、数ステップでスタイル化された画像を生成できます。
from diffusers import StableDiffusionXLPipeline, UNet2DConditionModel, LCMScheduler
import torch

unet = UNet2DConditionModel.from_pretrained(
    "latent-consistency/lcm-sdxl",
    dtype=torch.float16,
    variant="fp16",
)
pipe = StableDiffusionXLPipeline.from_pretrained(
    "stabilityai/stable-diffusion-xl-base-1.0", unet=unet, dtype=torch.float16, variant="fp16",
).to("cuda")  # or "mps", "xpu", "cpu"
pipe.scheduler = LCMScheduler.from_config(pipe.scheduler.config)
pipe.load_lora_weights("TheLastBen/Papercut_SDXL", weight_name="papercut.safetensors", adapter_name="papercut")

prompt = "papercut, a cute fox"
generator = torch.manual_seed(0)
image = pipe(
    prompt=prompt, num_inference_steps=4, generator=generator, guidance_scale=8.0
).images[0]
image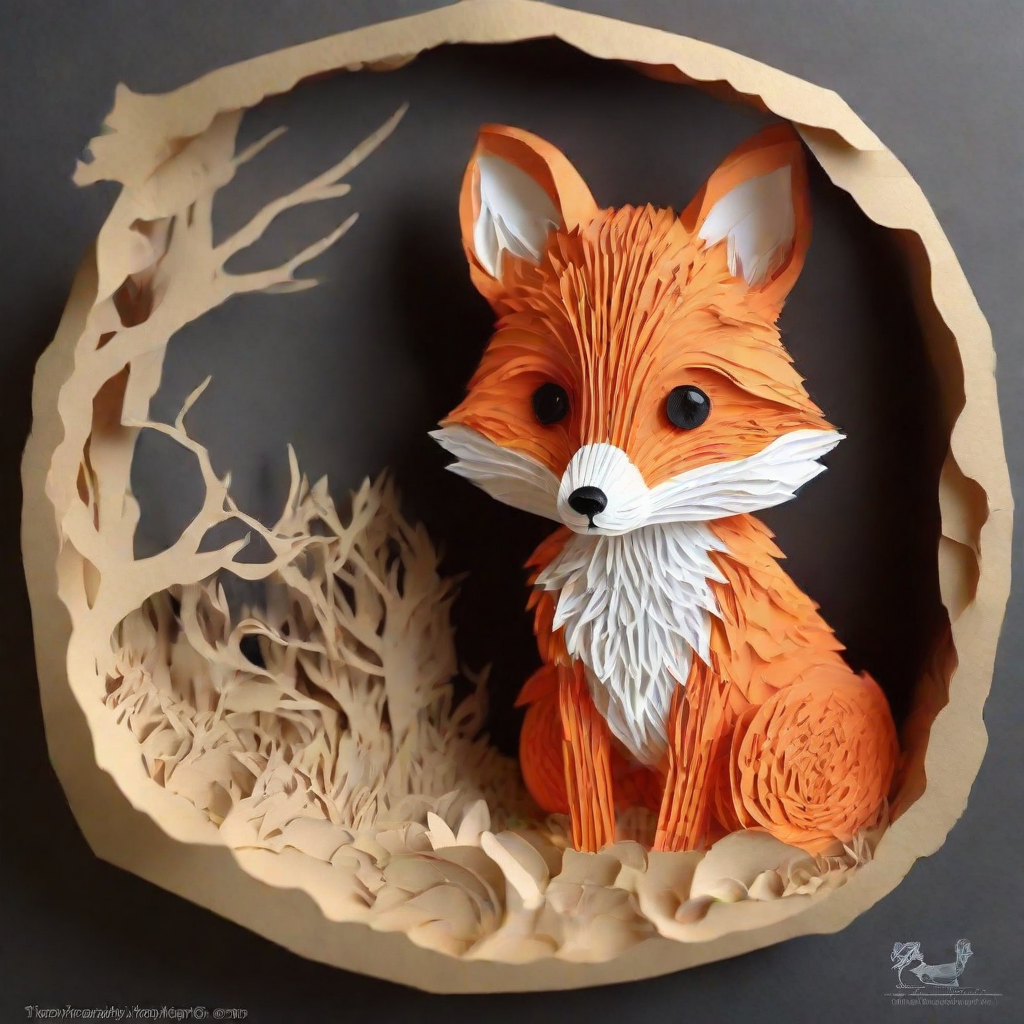
スケジューラーをLCMSchedulerに置き換えます。その後、load_lora_weights()メソッドを使用して、LCM-LoRAの重みと使用したいスタイルLoRAを読み込みます。両方のLoRAアダプターを~loaders.UNet2DConditionLoadersMixin.set_adaptersメソッドで組み合わせ、数ステップでスタイル付きの画像を生成します。
import torch
from diffusers import DiffusionPipeline, LCMScheduler

pipe = DiffusionPipeline.from_pretrained(
    "stabilityai/stable-diffusion-xl-base-1.0",
    variant="fp16",
    dtype=torch.float16
).to("cuda")  # or "mps", "xpu", "cpu"

pipe.scheduler = LCMScheduler.from_config(pipe.scheduler.config)

pipe.load_lora_weights("latent-consistency/lcm-lora-sdxl", adapter_name="lcm")
pipe.load_lora_weights("TheLastBen/Papercut_SDXL", weight_name="papercut.safetensors", adapter_name="papercut")

pipe.set_adapters(["lcm", "papercut"], adapter_weights=[1.0, 0.8])

prompt = "papercut, a cute fox"
generator = torch.manual_seed(0)
image = pipe(prompt, num_inference_steps=4, guidance_scale=1, generator=generator).images[0]
image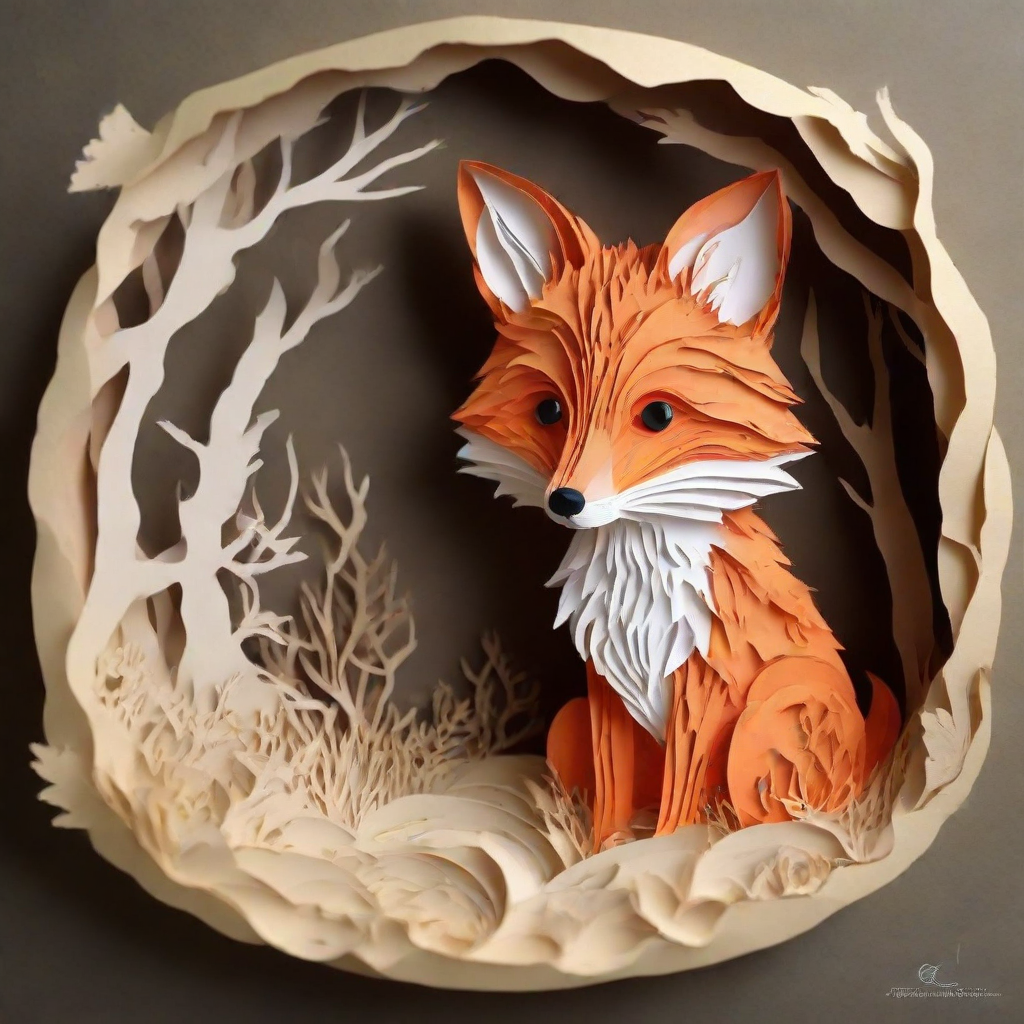
ControlNet
ControlNetは、Cannyエッジ、ポーズ推定、深度などの多様な入力に対して学習できるアダプターです。ControlNetをパイプラインに挿入することで、モデルに追加の条件付けと制御を提供し、より正確な生成を実現できます。
他の入力データで学習された追加のControlNetモデルは、lllyasvielのリポジトリで確認できます。
canny画像で学習されたControlNetモデルを読み込み、ControlNetModelに渡します。次に、LCMモデルをStableDiffusionControlNetPipelineに読み込み、スケジューラーをLCMSchedulerに置き換えます。これで、canny画像をパイプラインに渡し、画像を生成できます。
num_inference_steps、controlnet_conditioning_scale、cross_attention_kwargs、guidance_scaleの値をいろいろと試して、最適な結果を得てください。
import torch
import cv2
import numpy as np
from PIL import Image

from diffusers import StableDiffusionControlNetPipeline, ControlNetModel, LCMScheduler
from diffusers.utils import load_image, make_image_grid

image = load_image(
    "https://hf.co/datasets/huggingface/documentation-images/resolve/main/diffusers/input_image_vermeer.png"
).resize((512, 512))

image = np.array(image)

low_threshold = 100
high_threshold = 200

image = cv2.Canny(image, low_threshold, high_threshold)
image = image[:, :, None]
image = np.concatenate([image, image, image], axis=2)
canny_image = Image.fromarray(image)

controlnet = ControlNetModel.from_pretrained("lllyasviel/sd-controlnet-canny", dtype=torch.float16)
pipe = StableDiffusionControlNetPipeline.from_pretrained(
    "SimianLuo/LCM_Dreamshaper_v7",
    controlnet=controlnet,
    dtype=torch.float16,
    safety_checker=None,
).to("cuda")  # or "mps", "xpu", "cpu"
pipe.scheduler = LCMScheduler.from_config(pipe.scheduler.config)

generator = torch.manual_seed(0)
image = pipe(
    "the mona lisa",
    image=canny_image,
    num_inference_steps=4,
    generator=generator,
).images[0]
make_image_grid([canny_image, image], rows=1, cols=2)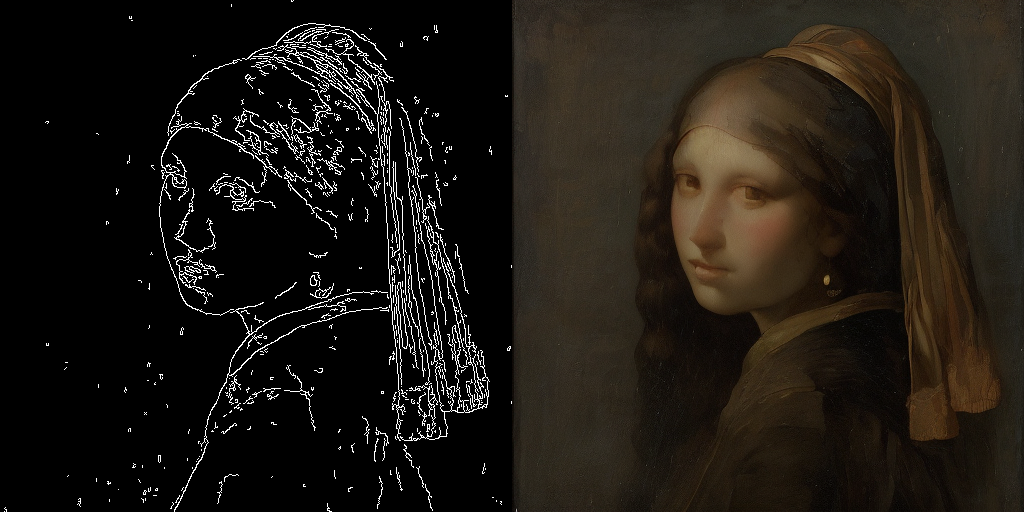
canny画像で学習されたControlNetモデルを読み込み、ControlNetModelに渡します。次に、Stable Diffusion v1.5モデルをStableDiffusionControlNetPipelineに読み込み、スケジューラーをLCMSchedulerに置き換えます。load_lora_weights()メソッドを使用してLCM-LoRAの重みを読み込み、canny画像をパイプラインに渡して画像を生成します。
num_inference_steps、controlnet_conditioning_scale、cross_attention_kwargs、guidance_scaleの値をいろいろと試して、最適な結果を得てください。
import torch
import cv2
import numpy as np
from PIL import Image

from diffusers import StableDiffusionControlNetPipeline, ControlNetModel, LCMScheduler
from diffusers.utils import load_image

image = load_image(
    "https://hf.co/datasets/huggingface/documentation-images/resolve/main/diffusers/input_image_vermeer.png"
).resize((512, 512))

image = np.array(image)

low_threshold = 100
high_threshold = 200

image = cv2.Canny(image, low_threshold, high_threshold)
image = image[:, :, None]
image = np.concatenate([image, image, image], axis=2)
canny_image = Image.fromarray(image)

controlnet = ControlNetModel.from_pretrained("lllyasviel/sd-controlnet-canny", dtype=torch.float16)
pipe = StableDiffusionControlNetPipeline.from_pretrained(
    "stable-diffusion-v1-5/stable-diffusion-v1-5",
    controlnet=controlnet,
    dtype=torch.float16,
    safety_checker=None,
    variant="fp16"
).to("cuda")  # or "mps", "xpu", "cpu"

pipe.scheduler = LCMScheduler.from_config(pipe.scheduler.config)

pipe.load_lora_weights("latent-consistency/lcm-lora-sdv1-5")

generator = torch.manual_seed(0)
image = pipe(
    "the mona lisa",
    image=canny_image,
    num_inference_steps=4,
    guidance_scale=1.5,
    controlnet_conditioning_scale=0.8,
    cross_attention_kwargs={"scale": 1},
    generator=generator,
).images[0]
image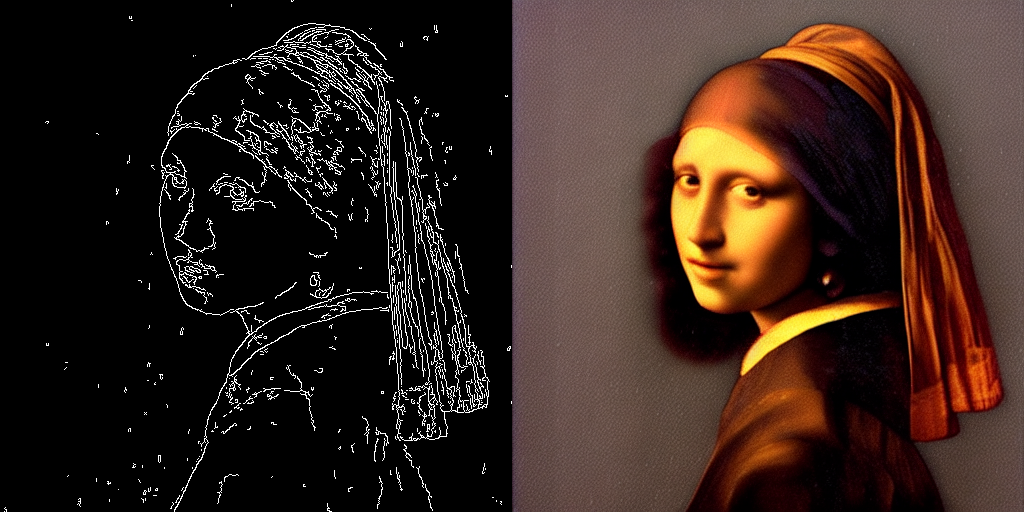
T2I-Adapter
T2I-Adapter は、ControlNet よりもさらに軽量なアダプターであり、事前学習済みモデルに条件付けを行うための追加入力を提供します。ControlNet より高速ですが、結果はやや劣る場合があります。
他の入力データで学習された追加のT2I-Adapterチェックポイントは、TencentArcのリポジトリで確認できます。
canny画像で学習されたT2IAdapterを読み込み、StableDiffusionXLAdapterPipelineに渡します。次に、LCMチェックポイントをUNet2DConditionModelに読み込み、スケジューラーをLCMSchedulerに置き換えます。その後、canny画像をパイプラインに渡し、画像を生成します。
import torch
import cv2
import numpy as np
from PIL import Image

from diffusers import StableDiffusionXLAdapterPipeline, UNet2DConditionModel, T2IAdapter, LCMScheduler
from diffusers.utils import load_image, make_image_grid

# detect the canny map in low resolution to avoid high-frequency details
image = load_image(
    "https://hf.co/datasets/huggingface/documentation-images/resolve/main/diffusers/input_image_vermeer.png"
).resize((384, 384))

image = np.array(image)

low_threshold = 100
high_threshold = 200

image = cv2.Canny(image, low_threshold, high_threshold)
image = image[:, :, None]
image = np.concatenate([image, image, image], axis=2)
canny_image = Image.fromarray(image).resize((1024, 1216))

adapter = T2IAdapter.from_pretrained("TencentARC/t2i-adapter-canny-sdxl-1.0", dtype=torch.float16, variant="fp16").to("cuda")  # or "mps", "xpu", "cpu"

unet = UNet2DConditionModel.from_pretrained(
    "latent-consistency/lcm-sdxl",
    dtype=torch.float16,
    variant="fp16",
)
pipe = StableDiffusionXLAdapterPipeline.from_pretrained(
    "stabilityai/stable-diffusion-xl-base-1.0",
    unet=unet,
    adapter=adapter,
    dtype=torch.float16,
    variant="fp16",
).to("cuda")

pipe.scheduler = LCMScheduler.from_config(pipe.scheduler.config)

prompt = "the mona lisa, 4k picture, high quality"
negative_prompt = "extra digit, fewer digits, cropped, worst quality, low quality, glitch, deformed, mutated, ugly, disfigured"

generator = torch.manual_seed(0)
image = pipe(
    prompt=prompt,
    negative_prompt=negative_prompt,
    image=canny_image,
    num_inference_steps=4,
    guidance_scale=5,
    adapter_conditioning_scale=0.8,
    adapter_conditioning_factor=1,
    generator=generator,
).images[0]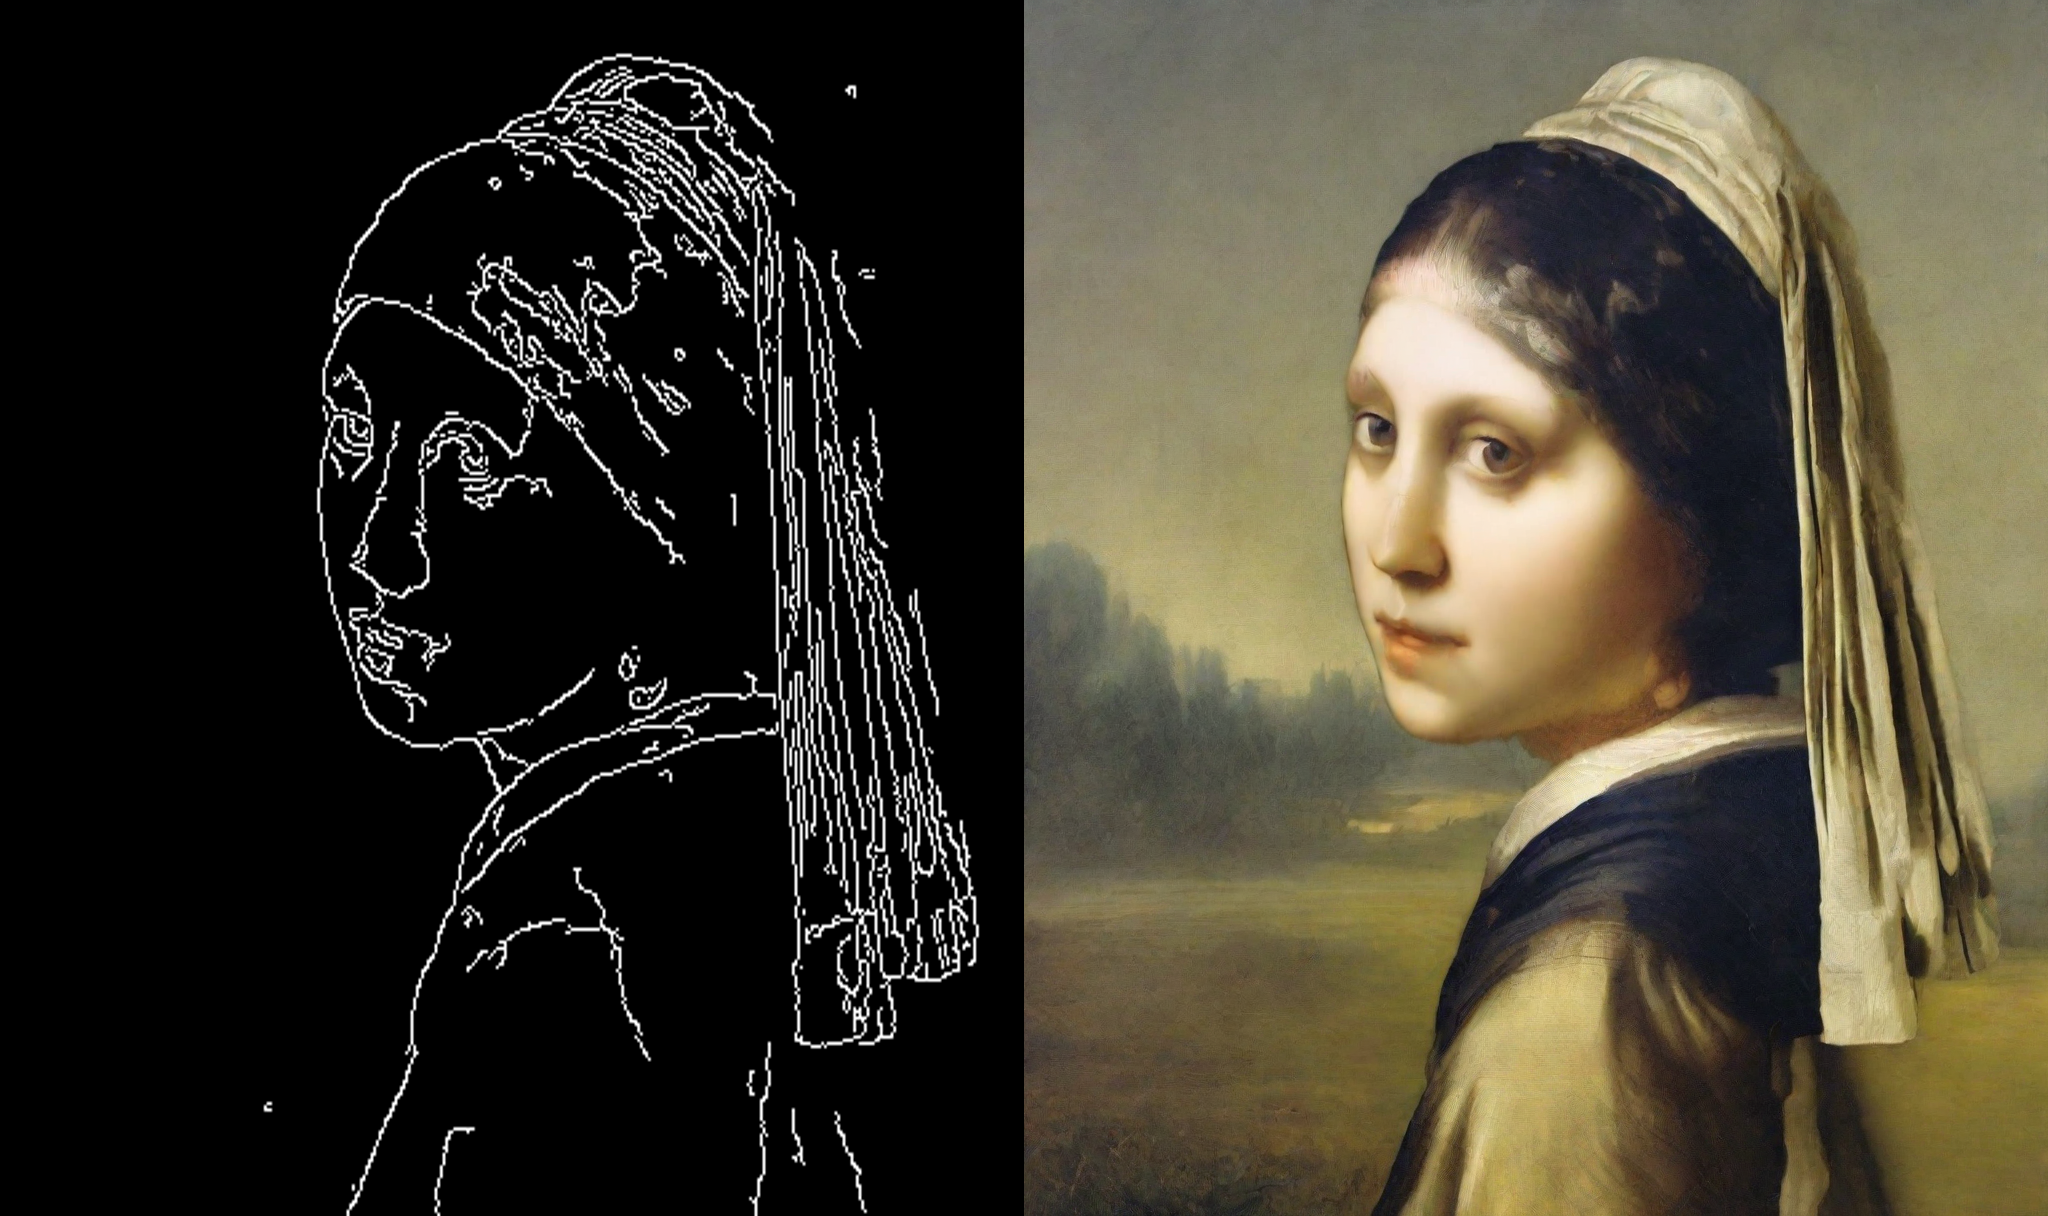
canny画像で学習されたT2IAdapterを読み込み、StableDiffusionXLAdapterPipelineに渡します。スケジューラーをLCMSchedulerに置き換え、load_lora_weights()メソッドを使用してLCM-LoRAの重みを読み込みます。canny画像をパイプラインに渡し、画像を生成します。
import torch
import cv2
import numpy as np
from PIL import Image

from diffusers import StableDiffusionXLAdapterPipeline, UNet2DConditionModel, T2IAdapter, LCMScheduler
from diffusers.utils import load_image, make_image_grid

# detect the canny map in low resolution to avoid high-frequency details
image = load_image(
    "https://hf.co/datasets/huggingface/documentation-images/resolve/main/diffusers/input_image_vermeer.png"
).resize((384, 384))

image = np.array(image)

low_threshold = 100
high_threshold = 200

image = cv2.Canny(image, low_threshold, high_threshold)
image = image[:, :, None]
image = np.concatenate([image, image, image], axis=2)
canny_image = Image.fromarray(image).resize((1024, 1024))

adapter = T2IAdapter.from_pretrained("TencentARC/t2i-adapter-canny-sdxl-1.0", dtype=torch.float16, variant="fp16").to("cuda")  # or "mps", "xpu", "cpu"

pipe = StableDiffusionXLAdapterPipeline.from_pretrained(
    "stabilityai/stable-diffusion-xl-base-1.0",
    adapter=adapter,
    dtype=torch.float16,
    variant="fp16",
).to("cuda")

pipe.scheduler = LCMScheduler.from_config(pipe.scheduler.config)

pipe.load_lora_weights("latent-consistency/lcm-lora-sdxl")

prompt = "the mona lisa, 4k picture, high quality"
negative_prompt = "extra digit, fewer digits, cropped, worst quality, low quality, glitch, deformed, mutated, ugly, disfigured"

generator = torch.manual_seed(0)
image = pipe(
    prompt=prompt,
    negative_prompt=negative_prompt,
    image=canny_image,
    num_inference_steps=4,
    guidance_scale=1.5,
    adapter_conditioning_scale=0.8,
    adapter_conditioning_factor=1,
    generator=generator,
).images[0]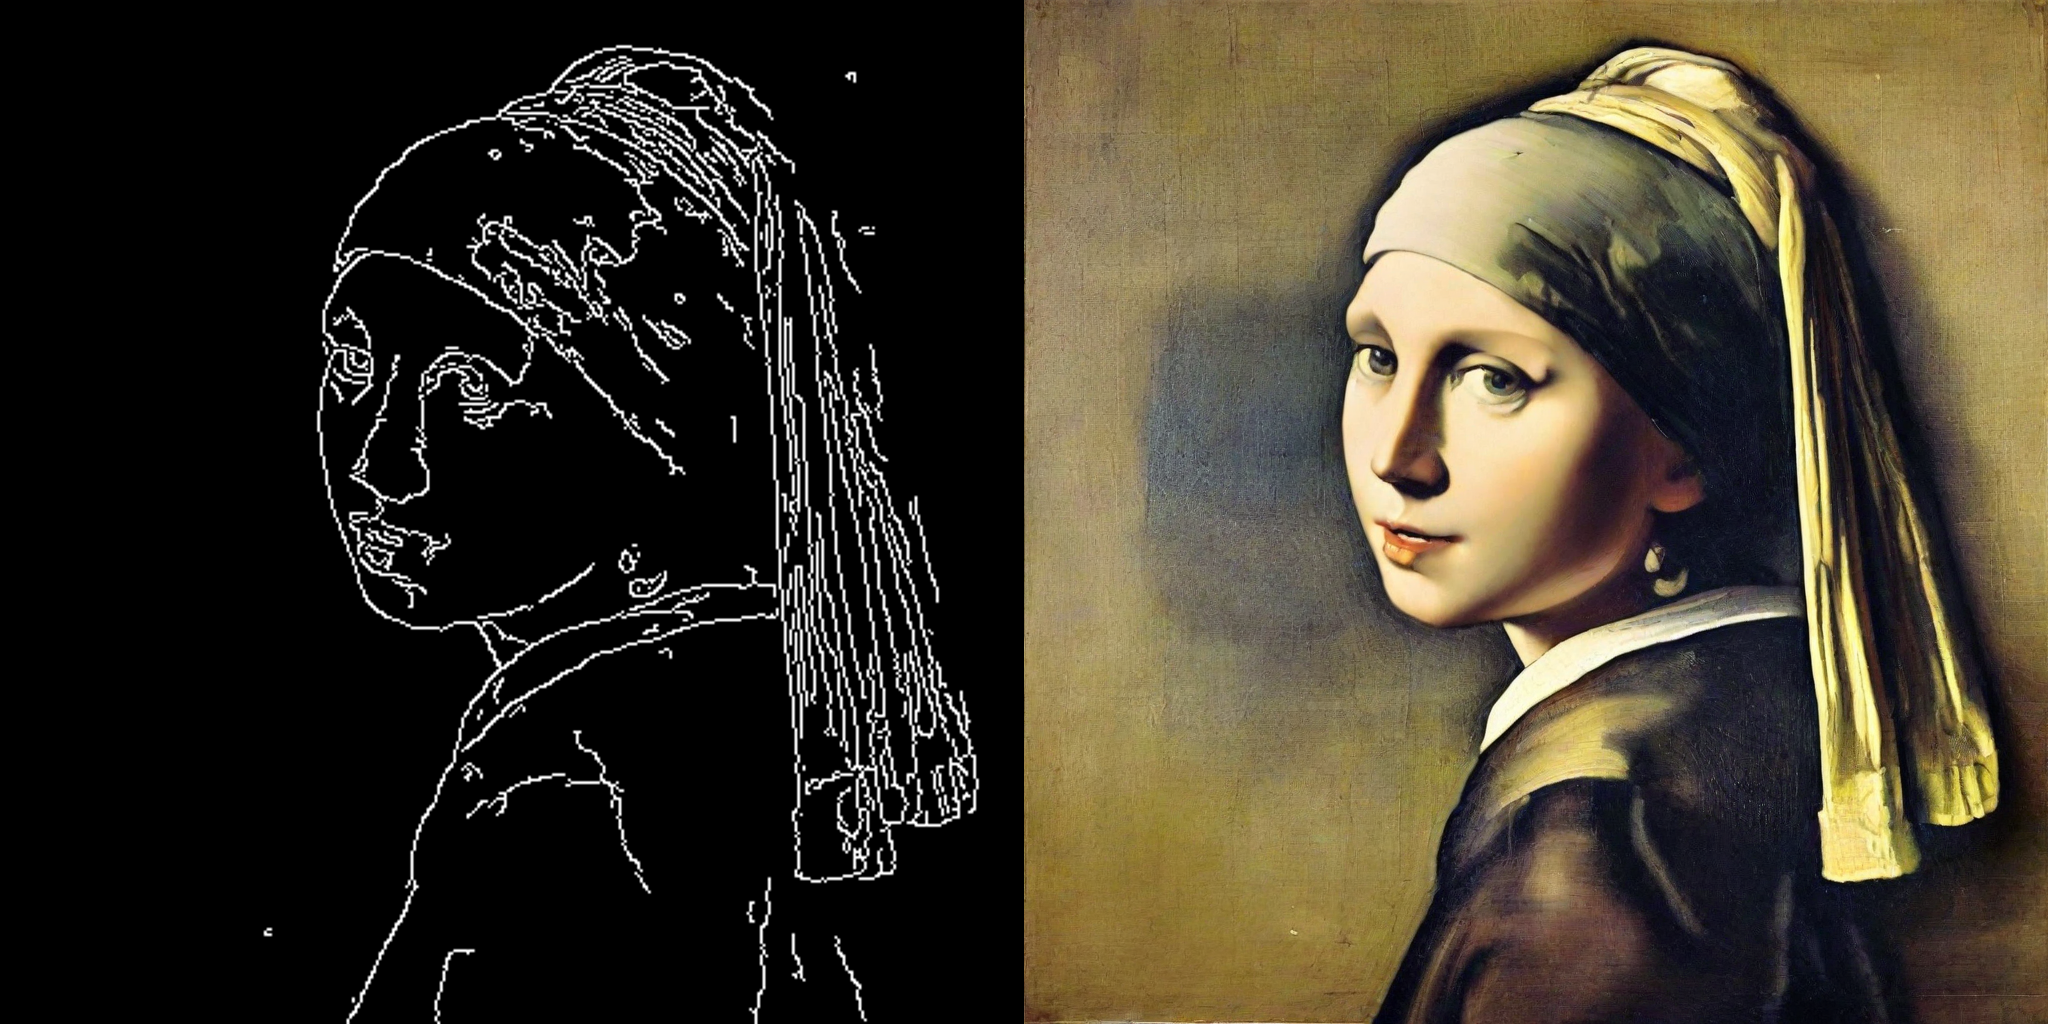
AnimateDiff
AnimateDiffは、画像に動きを追加するアダプターです。ほとんどのStable Diffusionモデルと組み合わせることができ、実質的にそれらを「動画生成」モデルに変換します。動画モデルで良い結果を得るには、通常、複数のフレーム(16〜24枚)を生成する必要があり、通常のStable Diffusionモデルでは非常に時間がかかる場合があります。LCM-LoRAを使用すると、各フレームのステップ数を4〜8ステップに抑えることで、この処理を高速化できます。
AnimateDiffPipelineを読み込み、MotionAdapterを渡します。次に、スケジューラーをLCMSchedulerに置き換え、~loaders.UNet2DConditionLoadersMixin.set_adaptersメソッドを使用して両方のLoRAアダプターを組み合わせます。これで、プロンプトをパイプラインに渡してアニメーション画像を生成できます。
import torch
from diffusers import MotionAdapter, AnimateDiffPipeline, DDIMScheduler, LCMScheduler
from diffusers.utils import export_to_gif

adapter = MotionAdapter.from_pretrained("guoyww/animatediff-motion-adapter-v1-5")
pipe = AnimateDiffPipeline.from_pretrained(
    "frankjoshua/toonyou_beta6",
    motion_adapter=adapter,
).to("cuda")  # or "mps", "xpu", "cpu"

# set scheduler
pipe.scheduler = LCMScheduler.from_config(pipe.scheduler.config)

# load LCM-LoRA
pipe.load_lora_weights("latent-consistency/lcm-lora-sdv1-5", adapter_name="lcm")
pipe.load_lora_weights("guoyww/animatediff-motion-lora-zoom-in", weight_name="diffusion_pytorch_model.safetensors", adapter_name="motion-lora")

pipe.set_adapters(["lcm", "motion-lora"], adapter_weights=[0.55, 1.2])

prompt = "best quality, masterpiece, 1girl, looking at viewer, blurry background, upper body, contemporary, dress"
generator = torch.manual_seed(0)
frames = pipe(
    prompt=prompt,
    num_inference_steps=5,
    guidance_scale=1.25,
    cross_attention_kwargs={"scale": 1},
    num_frames=24,
    generator=generator
).frames[0]
export_to_gif(frames, "animation.gif")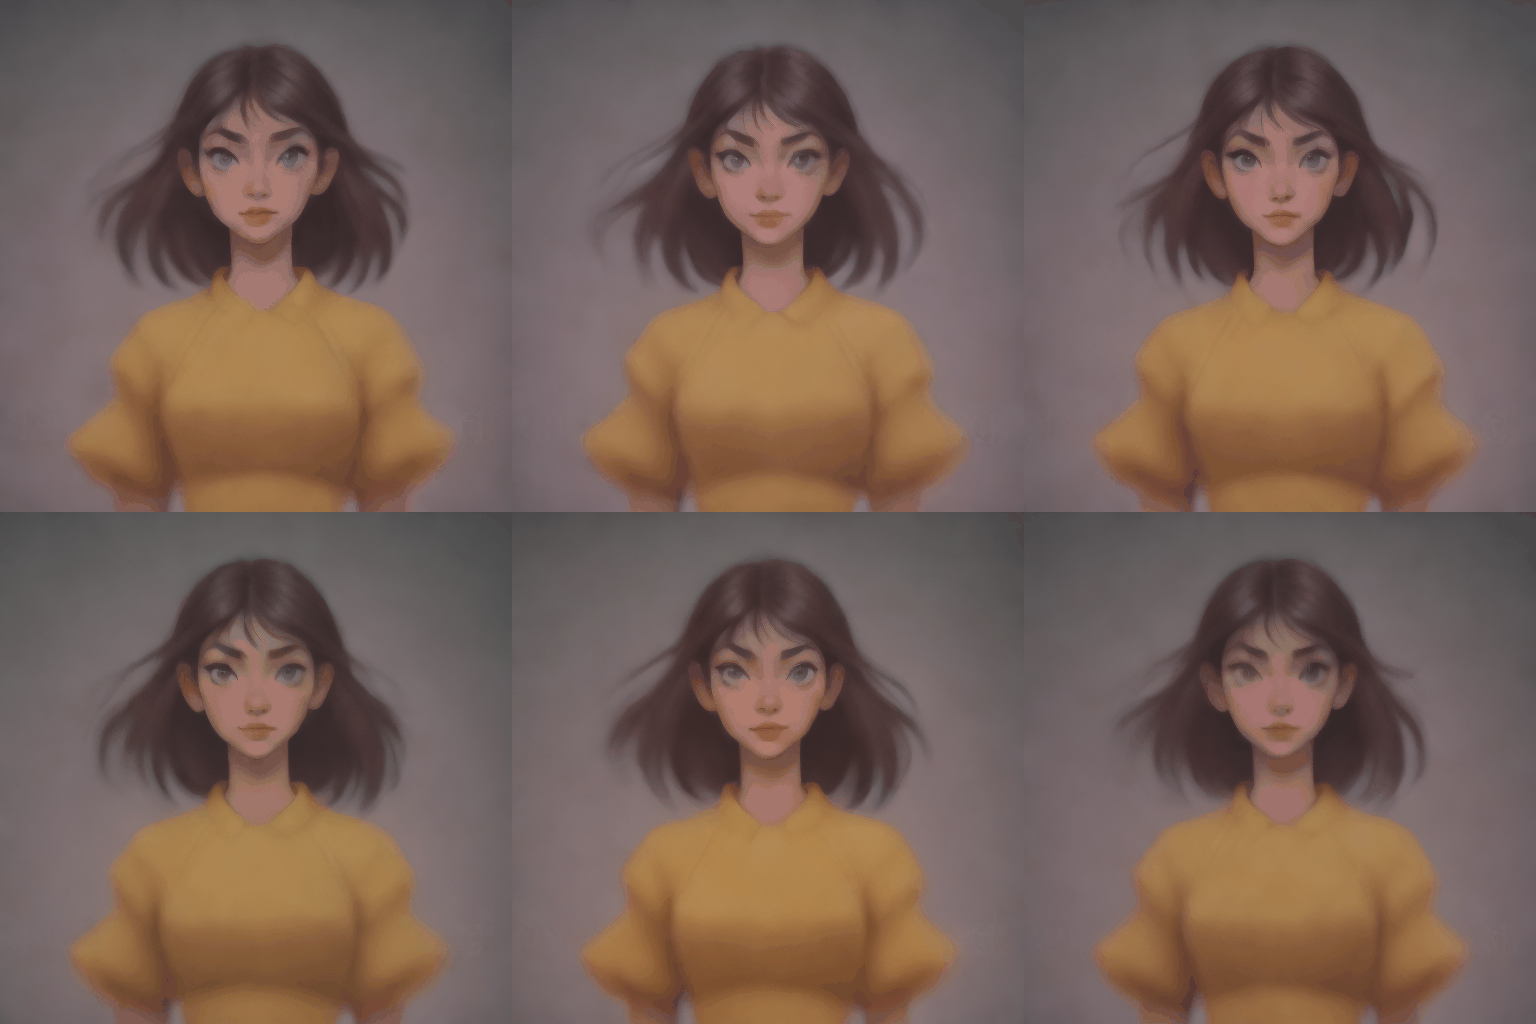
LatentConsistencyModelPipeline
クラス diffusers.LatentConsistencyModelPipeline
< source >( vae: AutoencoderKLtext_encoder: CLIPTextModeltokenizer: CLIPTokenizerunet: UNet2DConditionModelscheduler: LCMSchedulersafety_checker: StableDiffusionSafetyCheckerfeature_extractor: CLIPImageProcessorPilimage_encoder: transformers.models.clip.modeling_clip.CLIPVisionModelWithProjection | None = Nonerequires_safety_checker: bool = True )
パラメータ
- vae (AutoencoderKL) — 画像を潜在表現にエンコードし、潜在表現からデコードするための Variational Auto-Encoder (VAE) モデル。
- text_encoder (CLIPTextModel) — 凍結されたテキストエンコーダー (clip-vit-large-patch14)。
- tokenizer (CLIPTokenizer) —
テキストをトークン化するための
CLIPTokenizer。 - unet (UNet2DConditionModel) —
エンコードされた画像の潜在変数からノイズを除去するための
UNet2DConditionModel。 - scheduler (SchedulerMixin) —
unetと組み合わせて、エンコードされた画像の潜在変数からノイズを除去するために使用するスケジューラ。現在サポートされているのは LCMScheduler のみです。 - safety_checker (
StableDiffusionSafetyChecker) — 生成された画像が攻撃的または有害とみなされる可能性を推定する分類モジュールです。 モデルの潜在的な害に関する詳細については、モデルカードを参照してください。 - feature_extractor (CLIPImageProcessor) —
生成された画像から特徴量を抽出するための
CLIPImageProcessor。safety_checkerの入力として使用されます。 - requires_safety_checker (
bool、省略可能、デフォルトはTrue) — パイプラインがセーフティチェッカーコンポーネントを必要とするかどうかを示します。
潜在一貫性モデルを使用したテキストから画像への生成を行うPipeline。
このモデルは DiffusionPipeline を継承しています。すべてのパイプラインに実装されている汎用的なメソッド(ダウンロード、保存、特定のデバイスでの実行など)については、スーパークラスのドキュメントを参照してください。
パイプラインは、以下の読み込みメソッドも継承します:
- テキストインバージョンの埋め込みを読み込むためのload_textual_inversion()
- LoRA重みの読み込みにload_lora_weights()
- LoRA重みの保存にはsave_lora_weights()を使用します
.ckptファイルを読み込むためのfrom_single_file()- IP Adapterの読み込みにload_ip_adapter()
__call__
< source >( prompt: str | list[str] = Noneheight: int | None = Nonewidth: int | None = Nonenum_inference_steps: int = 4original_inference_steps: int = Nonetimesteps: list[int] = Noneguidance_scale: float = 8.5num_images_per_prompt: int | None = 1generator: typing.Union[torch.Generator, list[torch.Generator], NoneType] = Nonelatents: typing.Optional[torch.Tensor] = Noneprompt_embeds: typing.Optional[torch.Tensor] = Noneip_adapter_image: typing.Union[PIL.Image.Image, numpy.ndarray, torch.Tensor, list[PIL.Image.Image], list[numpy.ndarray], list[torch.Tensor], NoneType] = Noneip_adapter_image_embeds: list[torch.Tensor] | None = Noneoutput_type: str | None = 'pil'return_dict: bool = Truecross_attention_kwargs: dict[str, typing.Any] | None = Noneclip_skip: int | None = Nonecallback_on_step_end: typing.Optional[typing.Callable[[int, int], NoneType]] = Nonecallback_on_step_end_tensor_inputs: list[str] = ['latents']**kwargs ) → StableDiffusionPipelineOutput or tuple
パラメータ
- prompt (
strまたはlist[str]、任意) — 画像生成をガイドするためのプロンプトです。未定義の場合、prompt_embedsを渡す必要があります。 - height (
int、任意、デフォルトはself.unet.config.sample_size * self.vae_scale_factor) — 生成される画像のピクセル単位の縦幅です。 - width (
int、任意、デフォルトはself.unet.config.sample_size * self.vae_scale_factor) — 生成される画像の幅(ピクセル単位)。 - num_inference_steps (
int、任意、デフォルト値は 50)— デノイジングのステップ数です。デノイジングのステップ数を増やすと、推論速度が遅くなる代わりに、通常はより高品質な画像が得られます。 - original_inference_steps (
int, 任意) — 線形間隔のタイムステップスケジュールを生成するために使用される元の推論ステップ数です。論文の Skipping-Step 手法(セクション 4.3 参照)に従い、このスケジュールからnum_inference_steps個の等間隔のタイムステップを抽出して、最終的なタイムステップスケジュールとします。設定されない場合、スケジューラーのoriginal_inference_steps属性の値がデフォルトとして使用されます。 - timesteps (
list[int], 任意) — デノイジングプロセスに使用するカスタムタイムステップ。未定義の場合、元の LCM トレーニング/蒸留タイムステップスケジュール上で等間隔に配置されたnum_inference_steps個のタイムステップが使用されます。降順で指定する必要があります。 - guidance_scale (
float、任意、デフォルト値は 7.5) — guidance scale の値を高くすると、画像の品質が低下する代わりに、promptと密接に関連した画像を生成するようモデルが促されます。guidance scale はguidance_scale > 1の場合に有効になります。なお、元の latent consistency models の論文では、guidance scale を 1 減らした別の CFG 定式化が使用されており(論文の定式化ではguidance_scale > 0の場合に CFG が有効になります)、この点にご注意ください。 - num_images_per_prompt (
int、任意、デフォルトは 1) — プロンプトごとに生成する画像の数。 - generator (
torch.Generatorまたはlist[torch.Generator]、省略可) — 生成を決定論的にするためのtorch.Generator。 - latents (
torch.Tensor, 任意) — ガウス分布からサンプリングされた事前生成されたノイズ付き latents。画像生成のインプットとして使用します。異なるプロンプトで同じ生成を調整するために使用できます。指定されない場合、指定されたランダムgeneratorを用いてサンプリングを行い、latents テンソルが生成されます。 - prompt_embeds (
torch.Tensor, 任意) — 事前に生成されたテキスト埋め込みです。テキスト入力(プロンプトの重み付けなど)を簡単に調整するために使用できます。指定されない場合、prompt入力引数からテキスト埋め込みが生成されます。 - ip_adapter_image — (
PipelineImageInput, 任意): IP Adapter と組み合わせて使用する任意の画像入力です。 - ip_adapter_image_embeds (
list[torch.Tensor], 任意) — IP-Adapter 用の事前生成された画像埋め込みです。IP-Adapter の数と同じ長さのリストである必要があります。各要素は、(batch_size, num_images, emb_dim)の形状を持つテンソルである必要があります。do_classifier_free_guidanceがTrueに設定されている場合、負の画像埋め込みを含む必要があります。指定されない場合、ip_adapter_image入力引数から埋め込みが計算されます。 - output_type (
str、任意、デフォルトは"pil") — 生成された画像の出力形式です。PIL.Imageまたはnp.arrayから選択します。 - return_dict (
bool、任意、デフォルトはTrue) — プレーンなタプルではなく StableDiffusionPipelineOutput を返すかどうかを指定します。 - cross_attention_kwargs (
dict, 任意) — 指定された場合、self.processorで定義されているAttentionProcessorに渡される kwargs の辞書です。 - clip_skip (
int, 任意) — プロンプト埋め込みを計算する際に、CLIP からスキップするレイヤー数です。値が 1 の場合、最終レイヤーの直前のレイヤーの出力がプロンプト埋め込みの計算に使用されます。 - callback_on_step_end (
Callable, 省略可) — 推論中の各デノイジングステップの終了時に呼び出される関数です。この関数は、以下の引数とともに呼び出されます:callback_on_step_end(self: DiffusionPipeline, step: int, timestep: int, callback_kwargs: Dict)。callback_kwargsには、callback_on_step_end_tensor_inputsで指定されたすべてのテンソルのリストが含まれます。 - callback_on_step_end_tensor_inputs (
list、任意) —callback_on_step_end関数へのテンソル入力の一覧です。このリストで指定されたテンソルは、callback_kwargs引数として渡されます。パイプラインクラスの._callback_tensor_inputs属性にリストされている変数のみを、このリストに含めることができます。
戻り値
StableDiffusionPipelineOutput または tuple
If return_dict is True, StableDiffusionPipelineOutput is returned,
otherwise a tuple is returned where the first element is a list with the generated images and the
second element is a list of bools indicating whether the corresponding generated image contains
“not-safe-for-work” (nsfw) content.
生成用の pipeline への呼び出し関数。
例:
>>> from diffusers import DiffusionPipeline
>>> import torch

>>> pipe = DiffusionPipeline.from_pretrained("SimianLuo/LCM_Dreamshaper_v7")
>>> # To save GPU memory, torch.float16 can be used, but it may compromise image quality.
>>> pipe.to(torch_device="cuda", torch_dtype=torch.float32)

>>> prompt = "Self-portrait oil painting, a beautiful cyborg with golden hair, 8k"

>>> # Can be set to 1~50 steps. LCM support fast inference even <= 4 steps. Recommend: 1~8 steps.
>>> num_inference_steps = 4
>>> images = pipe(prompt=prompt, num_inference_steps=num_inference_steps, guidance_scale=8.0).images
>>> images[0].save("image.png")
enable_freeu
< source >( s1: floats2: floatb1: floatb2: float )
https://huggingface.co/papers/2309.11497 に記載されている FreeU メカニズムを有効にします。
スケーリング係数の後ろの接尾辞は、それらが適用されるステージを表しています。
Stable Diffusion v1、v2、Stable Diffusion XLなどの異なるパイプラインで良好に動作することが確認されている値の組み合わせについては、公式リポジトリを参照してください。
有効化されている場合、FreeUメカニズムを無効にします。
encode_prompt
< source >( promptdevicenum_images_per_promptdo_classifier_free_guidancenegative_prompt = Noneprompt_embeds: typing.Optional[torch.Tensor] = Nonenegative_prompt_embeds: typing.Optional[torch.Tensor] = Nonelora_scale: float | None = Noneclip_skip: int | None = None )
パラメータ
- prompt (
strまたはlist[str]、省略可能) — エンコードするプロンプト - device — (
torch.device): torch デバイス - num_images_per_prompt (
int) — 1つのプロンプトに対して生成する画像の数 - do_classifier_free_guidance (
bool) — classifier free guidance を使用するかどうか - negative_prompt (
strまたはlist[str]、省略可) — 画像生成をガイドしないプロンプトです。未定義の場合、代わりにnegative_prompt_embedsを渡す必要があります。ガイダンスを使用していない場合は無視されます(guidance_scaleが1未満の場合は無視されます)。 - prompt_embeds (
torch.Tensor, 任意) — 事前に生成されたテキスト埋め込み。テキスト入力の調整、例えばプロンプトの重み付けなどを容易に行うために使用できます。指定されない場合、prompt入力引数からテキスト埋め込みが生成されます。 - negative_prompt_embeds (
torch.Tensor, 任意) — 事前に生成されたネガティブなテキスト埋め込みです。テキスト入力の調整、例えばプロンプトの重み付けなどを簡単に実行できます。指定されない場合、negative_prompt入力引数から negative_prompt_embeds が生成されます。 - lora_scale (
float, 任意) — LoRA レイヤーが読み込まれている場合、テキストエンコーダーのすべての LoRA レイヤーに適用される LoRA スケールです。 - clip_skip (
int, 任意) — プロンプト埋め込みを計算する際に、CLIP からスキップするレイヤー数です。値が 1 の場合、最終レイヤーの直前のレイヤーの出力がプロンプト埋め込みの計算に使用されます。
プロンプトをテキストエンコーダーの隠れ状態にエンコードします。
get_guidance_scale_embedding
< source >( w: Tensorembedding_dim: int = 512dtype: dtype = torch.float32 ) → torch.Tensor
LatentConsistencyModelImg2ImgPipeline
クラス diffusers.LatentConsistencyModelImg2ImgPipeline
< source >( vae: AutoencoderKLtext_encoder: CLIPTextModeltokenizer: CLIPTokenizerunet: UNet2DConditionModelscheduler: LCMSchedulersafety_checker: StableDiffusionSafetyCheckerfeature_extractor: CLIPImageProcessorPilimage_encoder: transformers.models.clip.modeling_clip.CLIPVisionModelWithProjection | None = Nonerequires_safety_checker: bool = True )
パラメータ
- vae (AutoencoderKL) — 画像を潜在表現にエンコードし、潜在表現からデコードするための Variational Auto-Encoder (VAE) モデル。
- text_encoder (CLIPTextModel) — 凍結されたテキストエンコーダー (clip-vit-large-patch14)。
- tokenizer (CLIPTokenizer) —
テキストをトークン化するための
CLIPTokenizer。 - unet (UNet2DConditionModel) —
エンコードされた画像の潜在変数からノイズを除去するための
UNet2DConditionModel。 - scheduler (SchedulerMixin) —
unetと組み合わせて、エンコードされた画像の潜在変数からノイズを除去するために使用するスケジューラ。現在サポートされているのは LCMScheduler のみです。 - safety_checker (
StableDiffusionSafetyChecker) — 生成された画像が攻撃的または有害とみなされる可能性を推定する分類モジュールです。 モデルの潜在的な害に関する詳細については、モデルカードを参照してください。 - feature_extractor (CLIPImageProcessor) —
生成された画像から特徴量を抽出するための
CLIPImageProcessor。safety_checkerの入力として使用されます。 - requires_safety_checker (
bool、省略可能、デフォルトはTrue) — パイプラインがセーフティチェッカーコンポーネントを必要とするかどうかを示します。
潜在一貫性モデルを用いた画像から画像への生成を行うPipeline。
このモデルは DiffusionPipeline を継承しています。すべてのパイプラインに実装されている汎用的なメソッド(ダウンロード、保存、特定のデバイスでの実行など)については、スーパークラスのドキュメントを参照してください。
パイプラインは、以下の読み込みメソッドも継承します:
- テキストインバージョンの埋め込みを読み込むためのload_textual_inversion()
- LoRA重みの読み込みにload_lora_weights()
- LoRA重みの保存にはsave_lora_weights()を使用します
.ckptファイルを読み込むためのfrom_single_file()- IP Adapterの読み込みにload_ip_adapter()
__call__
< source >( prompt: str | list[str] = Noneimage: typing.Union[PIL.Image.Image, numpy.ndarray, torch.Tensor, list[PIL.Image.Image], list[numpy.ndarray], list[torch.Tensor]] = Nonenum_inference_steps: int = 4strength: float = 0.8original_inference_steps: int = Nonetimesteps: list[int] = Noneguidance_scale: float = 8.5num_images_per_prompt: int | None = 1generator: typing.Union[torch.Generator, list[torch.Generator], NoneType] = Nonelatents: typing.Optional[torch.Tensor] = Noneprompt_embeds: typing.Optional[torch.Tensor] = Noneip_adapter_image: typing.Union[PIL.Image.Image, numpy.ndarray, torch.Tensor, list[PIL.Image.Image], list[numpy.ndarray], list[torch.Tensor], NoneType] = Noneip_adapter_image_embeds: list[torch.Tensor] | None = Noneoutput_type: str | None = 'pil'return_dict: bool = Truecross_attention_kwargs: dict[str, typing.Any] | None = Noneclip_skip: int | None = Nonecallback_on_step_end: typing.Optional[typing.Callable[[int, int], NoneType]] = Nonecallback_on_step_end_tensor_inputs: list[str] = ['latents']**kwargs ) → StableDiffusionPipelineOutput or tuple
パラメータ
- prompt (
strまたはlist[str]、任意) — 画像生成をガイドするためのプロンプトです。未定義の場合、prompt_embedsを渡す必要があります。 - image (
torch.Tensor、PIL.Image.Image、np.ndarray、list[torch.Tensor]、list[PIL.Image.Image]、またはlist[np.ndarray]) —Imageまたは、開始点として使用される画像バッチを表すテンソル。画像の潜在変数もimageとして受け取れますが、潜在変数を直接渡す場合は再度エンコードされません。 - num_inference_steps (
int、任意、デフォルト値は 50)— デノイジングのステップ数です。デノイジングのステップ数を増やすと、推論速度が遅くなる代わりに、通常はより高品質な画像が得られます。 - strength (
float、任意、デフォルト値は 0.8) — 参照となるimageの変換の度合いを示します。0 から 1 の間の値である必要があります。imageが起点として使用され、strengthが大きいほど多くのノイズが追加されます。デノイジングのステップ数は、最初に追加されるノイズの量に依存します。strengthが 1 の場合、追加されるノイズは最大となり、デノイジングプロセスはnum_inference_stepsで指定された全イテレーション数分実行されます。値が 1 の場合、imageは実質的に無視されます。 - original_inference_steps (
int, 任意) — 線形間隔のタイムステップスケジュールを生成するために使用される元の推論ステップ数です。論文の Skipping-Step 手法(セクション 4.3 参照)に従い、このスケジュールからnum_inference_steps個の等間隔のタイムステップを抽出して、最終的なタイムステップスケジュールとします。設定されない場合、スケジューラーのoriginal_inference_steps属性の値がデフォルトとして使用されます。 - timesteps (
list[int], 任意) — デノイジングプロセスに使用するカスタムタイムステップ。未定義の場合、元の LCM トレーニング/蒸留タイムステップスケジュール上で等間隔に配置されたnum_inference_steps個のタイムステップが使用されます。降順で指定する必要があります。 - guidance_scale (
float、任意、デフォルト値は 7.5) — guidance scale の値を高くすると、画像の品質が低下する代わりに、promptと密接に関連した画像を生成するようモデルが促されます。guidance scale はguidance_scale > 1の場合に有効になります。なお、元の latent consistency models の論文では、guidance scale を 1 減らした別の CFG 定式化が使用されており(論文の定式化ではguidance_scale > 0の場合に CFG が有効になります)、この点にご注意ください。 - num_images_per_prompt (
int、任意、デフォルトは 1) — プロンプトごとに生成する画像の数。 - generator (
torch.Generatorまたはlist[torch.Generator]、省略可) — 生成を決定論的にするためのtorch.Generator。 - latents (
torch.Tensor, 任意) — ガウス分布からサンプリングされた事前生成されたノイズ付き latents。画像生成のインプットとして使用します。異なるプロンプトで同じ生成を調整するために使用できます。指定されない場合、指定されたランダムgeneratorを用いてサンプリングを行い、latents テンソルが生成されます。 - prompt_embeds (
torch.Tensor, 任意) — 事前に生成されたテキスト埋め込みです。テキスト入力(プロンプトの重み付けなど)を簡単に調整するために使用できます。指定されない場合、prompt入力引数からテキスト埋め込みが生成されます。 - ip_adapter_image — (
PipelineImageInput, 任意): IP Adapter と組み合わせて使用する任意の画像入力です。 - ip_adapter_image_embeds (
list[torch.Tensor], 任意) — IP-Adapter 用の事前生成された画像埋め込みです。IP-Adapter の数と同じ長さのリストである必要があります。各要素は、(batch_size, num_images, emb_dim)の形状を持つテンソルである必要があります。do_classifier_free_guidanceがTrueに設定されている場合、負の画像埋め込みを含む必要があります。指定されない場合、ip_adapter_image入力引数から埋め込みが計算されます。 - output_type (
str、任意、デフォルトは"pil") — 生成された画像の出力形式です。PIL.Imageまたはnp.arrayから選択します。 - return_dict (
bool、任意、デフォルトはTrue) — プレーンなタプルではなく StableDiffusionPipelineOutput を返すかどうかを指定します。 - cross_attention_kwargs (
dict, 任意) — 指定された場合、self.processorで定義されているAttentionProcessorに渡される kwargs の辞書です。 - clip_skip (
int, 任意) — プロンプト埋め込みを計算する際に、CLIP からスキップするレイヤー数です。値が 1 の場合、最終レイヤーの直前のレイヤーの出力がプロンプト埋め込みの計算に使用されます。 - callback_on_step_end (
Callable, 省略可) — 推論中の各デノイジングステップの終了時に呼び出される関数です。この関数は、以下の引数とともに呼び出されます:callback_on_step_end(self: DiffusionPipeline, step: int, timestep: int, callback_kwargs: Dict)。callback_kwargsには、callback_on_step_end_tensor_inputsで指定されたすべてのテンソルのリストが含まれます。 - callback_on_step_end_tensor_inputs (
list、任意) —callback_on_step_end関数へのテンソル入力の一覧です。このリストで指定されたテンソルは、callback_kwargs引数として渡されます。パイプラインクラスの._callback_tensor_inputs属性にリストされている変数のみを、このリストに含めることができます。
戻り値
StableDiffusionPipelineOutput または tuple
If return_dict is True, StableDiffusionPipelineOutput is returned,
otherwise a tuple is returned where the first element is a list with the generated images and the
second element is a list of bools indicating whether the corresponding generated image contains
“not-safe-for-work” (nsfw) content.
生成用の pipeline への呼び出し関数。
例:
>>> from diffusers import AutoPipelineForImage2Image
>>> import torch
>>> import PIL

>>> pipe = AutoPipelineForImage2Image.from_pretrained("SimianLuo/LCM_Dreamshaper_v7")
>>> # To save GPU memory, torch.float16 can be used, but it may compromise image quality.
>>> pipe.to(torch_device="cuda", torch_dtype=torch.float32)

>>> prompt = "High altitude snowy mountains"
>>> image = PIL.Image.open("./snowy_mountains.png")

>>> # Can be set to 1~50 steps. LCM support fast inference even <= 4 steps. Recommend: 1~8 steps.
>>> num_inference_steps = 4
>>> images = pipe(
...     prompt=prompt, image=image, num_inference_steps=num_inference_steps, guidance_scale=8.0
... ).images

>>> images[0].save("image.png")
enable_freeu
< source >( s1: floats2: floatb1: floatb2: float )
https://huggingface.co/papers/2309.11497 に記載されている FreeU メカニズムを有効にします。
スケーリング係数の後ろの接尾辞は、それらが適用されるステージを表しています。
Stable Diffusion v1、v2、Stable Diffusion XLなどの異なるパイプラインで良好に動作することが確認されている値の組み合わせについては、公式リポジトリを参照してください。
有効化されている場合、FreeUメカニズムを無効にします。
encode_prompt
< source >( promptdevicenum_images_per_promptdo_classifier_free_guidancenegative_prompt = Noneprompt_embeds: typing.Optional[torch.Tensor] = Nonenegative_prompt_embeds: typing.Optional[torch.Tensor] = Nonelora_scale: float | None = Noneclip_skip: int | None = None )
パラメータ
- prompt (
strまたはlist[str]、省略可能) — エンコードするプロンプト - device — (
torch.device): torch デバイス - num_images_per_prompt (
int) — 1つのプロンプトに対して生成する画像の数 - do_classifier_free_guidance (
bool) — classifier free guidance を使用するかどうか - negative_prompt (
strまたはlist[str]、省略可) — 画像生成をガイドしないプロンプトです。未定義の場合、代わりにnegative_prompt_embedsを渡す必要があります。ガイダンスを使用していない場合は無視されます(guidance_scaleが1未満の場合は無視されます)。 - prompt_embeds (
torch.Tensor, 任意) — 事前に生成されたテキスト埋め込み。テキスト入力の調整、例えばプロンプトの重み付けなどを容易に行うために使用できます。指定されない場合、prompt入力引数からテキスト埋め込みが生成されます。 - negative_prompt_embeds (
torch.Tensor, 任意) — 事前に生成されたネガティブなテキスト埋め込みです。テキスト入力の調整、例えばプロンプトの重み付けなどを簡単に実行できます。指定されない場合、negative_prompt入力引数から negative_prompt_embeds が生成されます。 - lora_scale (
float, 任意) — LoRA レイヤーが読み込まれている場合、テキストエンコーダーのすべての LoRA レイヤーに適用される LoRA スケールです。 - clip_skip (
int, 任意) — プロンプト埋め込みを計算する際に、CLIP からスキップするレイヤー数です。値が 1 の場合、最終レイヤーの直前のレイヤーの出力がプロンプト埋め込みの計算に使用されます。
プロンプトをテキストエンコーダーの隠れ状態にエンコードします。
get_guidance_scale_embedding
< source >( w: Tensorembedding_dim: int = 512dtype: dtype = torch.float32 ) → torch.Tensor
StableDiffusionPipelineOutput
class diffusers.pipelines.stable_diffusion.StableDiffusionPipelineOutput
< source >( images: list[PIL.Image.Image] | numpy.ndarraynsfw_content_detected: list[bool] | None )
Stable Diffusion パイプライン用の出力クラスです。