
Diffusers documentation
인페인팅
인페인팅
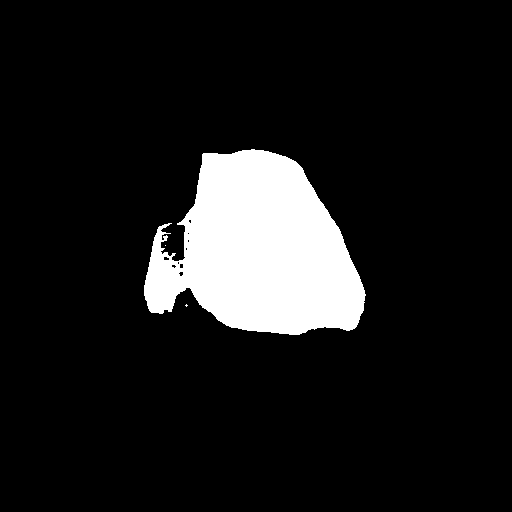
Inpainting은 이미지의 특정 영역을 대체하거나 편집합니다. 이는 결함 및 아티팩트 제거와 같은 이미지 복원, 또는 이미지 영역을 완전히 새로운 것으로 대체하는 데 유용한 도구입니다. Inpainting은 이미지를 채울 영역을 결정하기 위해 마스크에 의존합니다. inpaint할 영역은 흰색 픽셀로, 유지할 영역은 검은색 픽셀로 표시됩니다. 흰색 픽셀은 프롬프트에 의해 채워집니다.
🤗 Diffusers를 사용하면 다음과 같이 inpainting을 수행할 수 있습니다:
- AutoPipelineForInpainting 클래스로 inpainting 체크포인트를 로드합니다. 체크포인트에 따라 로드할 적절한 파이프라인 클래스를 자동으로 감지합니다:
import torch
from diffusers import AutoPipelineForInpainting
from diffusers.utils import load_image, make_image_grid

pipeline = AutoPipelineForInpainting.from_pretrained(
    "kandinsky-community/kandinsky-2-2-decoder-inpaint", dtype=torch.float16
)
pipeline.enable_model_cpu_offload()
# remove following line if xFormers is not installed or you have PyTorch 2.0 or higher installed
pipeline.enable_xformers_memory_efficient_attention()
가이드 전반에서 메모리를 절약하고 추론 속도를 높이기 위해 enable_model_cpu_offload()와 enable_xformers_memory_efficient_attention()를 사용하는 것을 확인할 수 있습니다. PyTorch 2.0을 사용하는 경우, 파이프라인에서 enable_xformers_memory_efficient_attention()를 호출할 필요가 없으며, PyTorch 2.0의 네이티브 scaled-dot product attention를 이미 사용하고 있기 때문입니다.
- 베이스 이미지와 마스크 이미지를 로드합니다:
init_image = load_image("https://huggingface.co/datasets/huggingface/documentation-images/resolve/main/diffusers/inpaint.png")
mask_image = load_image("https://huggingface.co/datasets/huggingface/documentation-images/resolve/main/diffusers/inpaint_mask.png")- 이미지를 인페인팅할 프롬프트를 생성하고, base 이미지와 mask 이미지를 함께 파이프라인에 전달합니다:
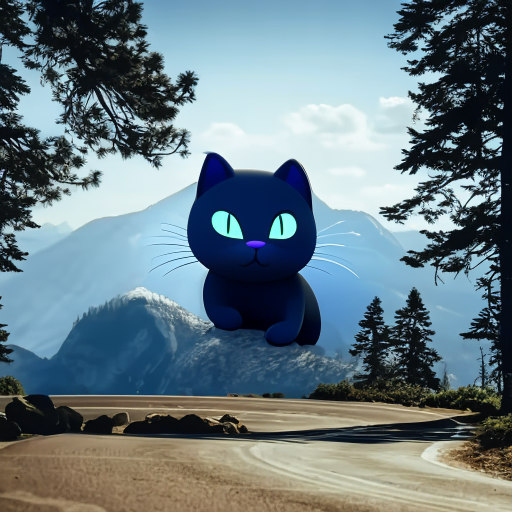
prompt = "a black cat with glowing eyes, cute, adorable, disney, pixar, highly detailed, 8k"
negative_prompt = "bad anatomy, deformed, ugly, disfigured"
image = pipeline(prompt=prompt, negative_prompt=negative_prompt, image=init_image, mask_image=mask_image).images[0]
make_image_grid([init_image, mask_image, image], rows=1, cols=3)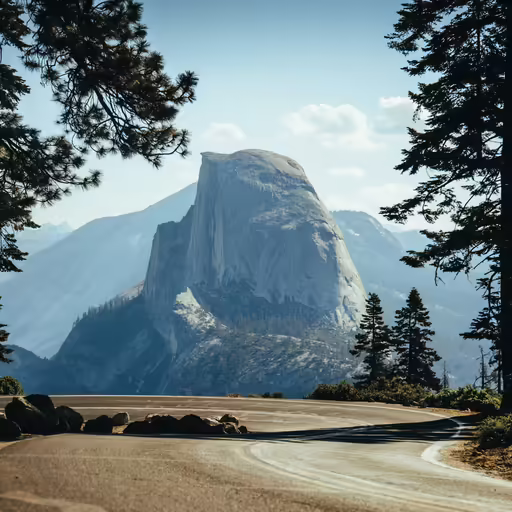
마스크 이미지 생성
이 가이드에서는 편의를 위해 모든 코드 예제에 마스크 이미지가 제공됩니다. 사용자 자신의 이미지로 인페인팅을 수행할 수 있지만, 이를 위해 마스크 이미지를 생성해야 합니다. 아래 Space를 사용하여 마스크 이미지를 쉽게 생성해 보세요.
인페인팅할 기본 이미지를 업로드하고 스케치 도구를 사용해 마스크를 그려 보세요. 완료되면 Run을 클릭하여 마스크 이미지를 생성하고 다운로드하세요.
마스크 블러
blur() 메서드는 원본 이미지와 inpaint 영역을 블렌딩하는 방식을 선택할 수 있는 옵션을 제공합니다. 블러의 정도는 blur_factor 파라미터로 결정됩니다. blur_factor 값을 높이면 마스크 가장자리에 적용되는 블러량이 증가하여 원본 이미지와 inpaint 영역 사이의 전환이 부드러워집니다. blur_factor 값이 낮거나 0이면 마스크의 날카로운 가장자리가 유지됩니다.
이를 사용하려면 이미지 프로세서로 흐릿한 마스크를 생성하세요.
import torch
from diffusers import AutoPipelineForInpainting
from diffusers.utils import load_image
from PIL import Image

pipeline = AutoPipelineForInpainting.from_pretrained("stable-diffusion-v1-5/stable-diffusion-v1-5", dtype=torch.float16).to('cuda')  # or "mps", "xpu", "cpu"

mask = load_image("https://huggingface.co/datasets/YiYiXu/testing-images/resolve/main/seashore_mask.png")
blurred_mask = pipeline.mask_processor.blur(mask, blur_factor=33)
blurred_mask

인기 모델
Stable Diffusion Inpainting, Stable Diffusion XL (SDXL) Inpainting, Kandinsky 2.2 Inpainting은 인페인팅에 가장 인기 있는 모델 중 일부입니다. SDXL은 일반적으로 Stable Diffusion v1.5보다 높은 해상도의 이미지를 생성하며, Kandinsky 2.2도 고품질 이미지 생성이 가능합니다.
Stable Diffusion Inpainting
Stable Diffusion Inpainting은 512x512 이미지에서 inpainting으로 fine-tuning된 latent diffusion 모델입니다. 상대적으로 빠르고 좋은 품질의 이미지를 생성하므로 좋은 시작점이 됩니다. 이 모델을 inpainting에 사용하려면 프롬프트, base 및 mask 이미지를 pipeline에 전달해야 합니다:
import torch
from diffusers import AutoPipelineForInpainting
from diffusers.utils import load_image, make_image_grid

pipeline = AutoPipelineForInpainting.from_pretrained(
    "stable-diffusion-v1-5/stable-diffusion-inpainting", dtype=torch.float16, variant="fp16"
)
pipeline.enable_model_cpu_offload()
# remove following line if xFormers is not installed or you have PyTorch 2.0 or higher installed
pipeline.enable_xformers_memory_efficient_attention()

# load base and mask image
init_image = load_image("https://huggingface.co/datasets/huggingface/documentation-images/resolve/main/diffusers/inpaint.png")
mask_image = load_image("https://huggingface.co/datasets/huggingface/documentation-images/resolve/main/diffusers/inpaint_mask.png")

generator = torch.Generator("cuda").manual_seed(92)
prompt = "concept art digital painting of an elven castle, inspired by lord of the rings, highly detailed, 8k"
image = pipeline(prompt=prompt, image=init_image, mask_image=mask_image, generator=generator).images[0]
make_image_grid([init_image, mask_image, image], rows=1, cols=3)
Stable Diffusion XL (SDXL) Inpainting
SDXL은 Stable Diffusion v1.5보다 크고 강력한 버전입니다. 이 모델은 2단계 모델 프로세스를 따를 수 있습니다(각 모델을 단독으로 사용할 수도 있습니다). base 모델이 이미지를 생성하고, refiner 모델이 해당 이미지를 받아 세부 사항과 품질을 한층 더 향상시킵니다. SDXL을 사용하는 방법과 파라미터를 구성하는 방법에 대한 보다 포괄적인 가이드는 SDXL 가이드를 참고하세요.
import torch
from diffusers import AutoPipelineForInpainting
from diffusers.utils import load_image, make_image_grid

pipeline = AutoPipelineForInpainting.from_pretrained(
    "diffusers/stable-diffusion-xl-1.0-inpainting-0.1", dtype=torch.float16, variant="fp16"
)
pipeline.enable_model_cpu_offload()
# remove following line if xFormers is not installed or you have PyTorch 2.0 or higher installed
pipeline.enable_xformers_memory_efficient_attention()

# load base and mask image
init_image = load_image("https://huggingface.co/datasets/huggingface/documentation-images/resolve/main/diffusers/inpaint.png")
mask_image = load_image("https://huggingface.co/datasets/huggingface/documentation-images/resolve/main/diffusers/inpaint_mask.png")

generator = torch.Generator("cuda").manual_seed(92)
prompt = "concept art digital painting of an elven castle, inspired by lord of the rings, highly detailed, 8k"
image = pipeline(prompt=prompt, image=init_image, mask_image=mask_image, generator=generator).images[0]
make_image_grid([init_image, mask_image, image], rows=1, cols=3)
Kandinsky 2.2 Inpainting
Kandinsky 모델 계열은 두 개의 모델을 사용한다는 점에서 SDXL과 유사합니다. 이미지 사전 모델은 이미지 임베딩을 생성하고, 확산 모델은 이를 기반으로 이미지를 생성합니다. 이미지 사전 모델과 확산 모델을 별도로 로드할 수 있지만, Kandinsky 2.2를 사용하는 가장 쉬운 방법은 내부적으로 KandinskyV22InpaintCombinedPipeline을 사용하는 AutoPipelineForInpainting 클래스에 로드하는 것입니다.
import torch
from diffusers import AutoPipelineForInpainting
from diffusers.utils import load_image, make_image_grid

pipeline = AutoPipelineForInpainting.from_pretrained(
    "kandinsky-community/kandinsky-2-2-decoder-inpaint", dtype=torch.float16
)
pipeline.enable_model_cpu_offload()
# remove following line if xFormers is not installed or you have PyTorch 2.0 or higher installed
pipeline.enable_xformers_memory_efficient_attention()

# load base and mask image
init_image = load_image("https://huggingface.co/datasets/huggingface/documentation-images/resolve/main/diffusers/inpaint.png")
mask_image = load_image("https://huggingface.co/datasets/huggingface/documentation-images/resolve/main/diffusers/inpaint_mask.png")

generator = torch.Generator("cuda").manual_seed(92)
prompt = "concept art digital painting of an elven castle, inspired by lord of the rings, highly detailed, 8k"
image = pipeline(prompt=prompt, image=init_image, mask_image=mask_image, generator=generator).images[0]
make_image_grid([init_image, mask_image, image], rows=1, cols=3) 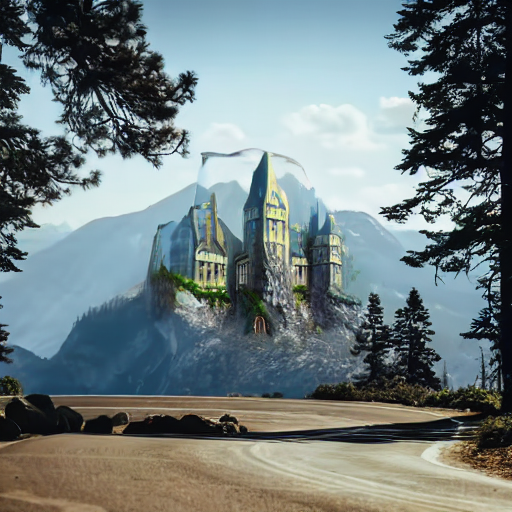
Non-inpaint 전용 체크포인트
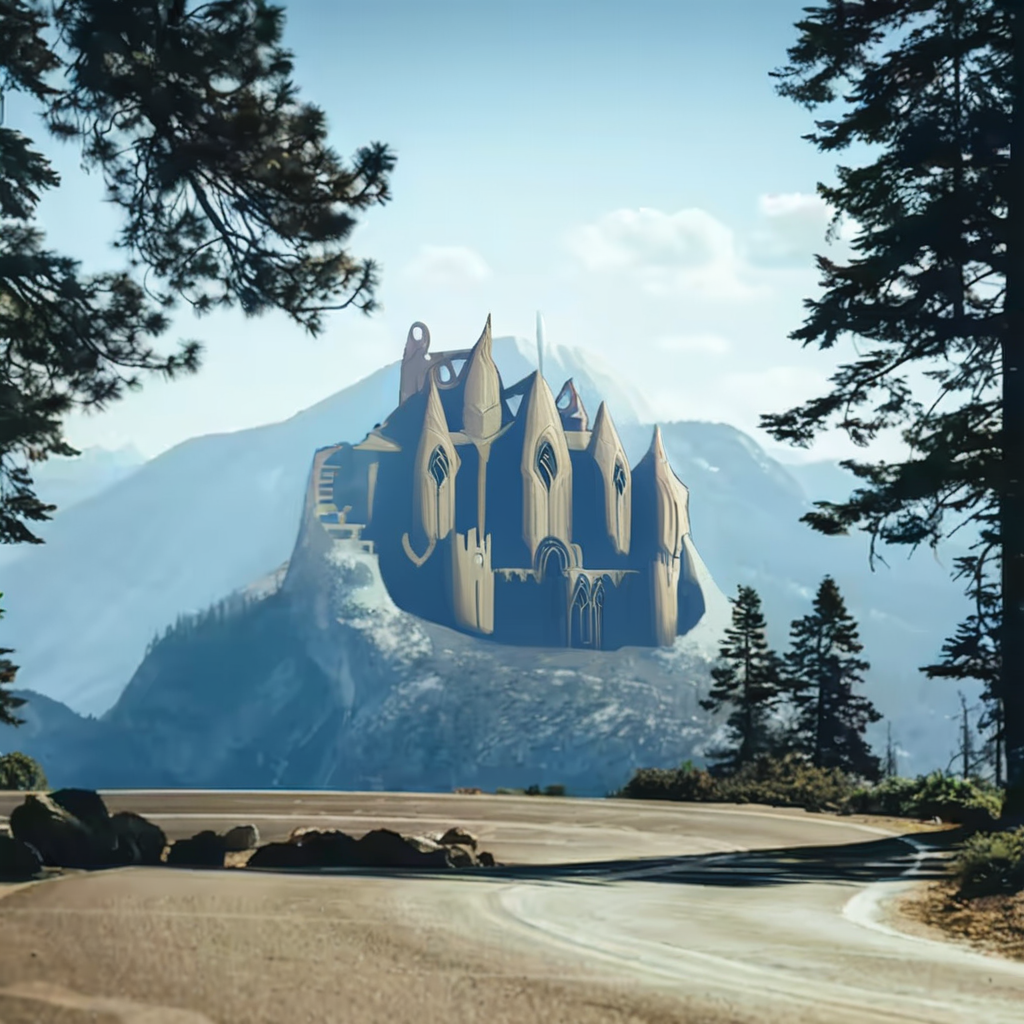
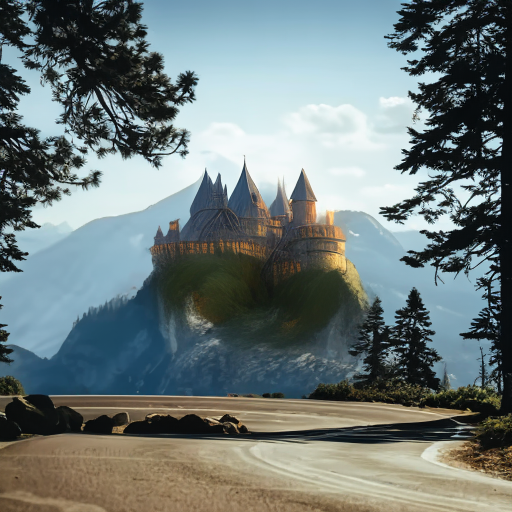
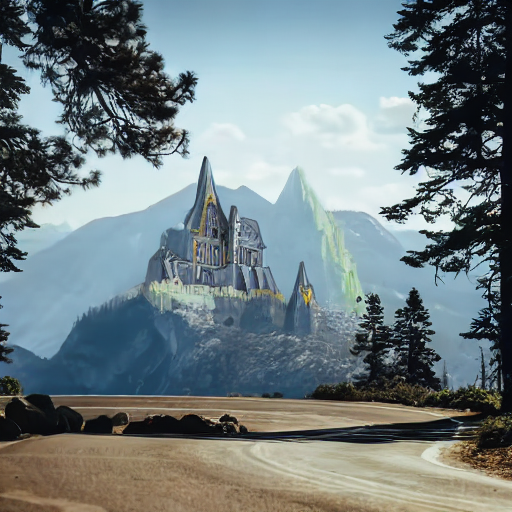
지금까지 이 가이드에서는 stable-diffusion-v1-5/stable-diffusion-inpainting과 같은 inpaint 전용 체크포인트를 사용해 왔습니다. 하지만 stable-diffusion-v1-5/stable-diffusion-v1-5과 같은 일반 체크포인트도 사용할 수 있습니다. 두 체크포인트의 결과를 비교해 보겠습니다.
왼쪽 이미지는 일반 체크포인트에서 생성된 것이고, 오른쪽 이미지는 인페인팅 체크포인트에서 생성된 것입니다. 왼쪽 이미지가 덜 깔끔하며, 모델이 인페인팅해야 할 영역의 윤곽이 여전히 보인다는 점을 바로 확인할 수 있습니다. 오른쪽 이미지는 훨씬 깔끔하고, 인페인팅된 영역이 더 자연스러워 보입니다.
import torch
from diffusers import AutoPipelineForInpainting
from diffusers.utils import load_image, make_image_grid

pipeline = AutoPipelineForInpainting.from_pretrained(
    "stable-diffusion-v1-5/stable-diffusion-v1-5", dtype=torch.float16, variant="fp16"
)
pipeline.enable_model_cpu_offload()
# remove following line if xFormers is not installed or you have PyTorch 2.0 or higher installed
pipeline.enable_xformers_memory_efficient_attention()

# load base and mask image
init_image = load_image("https://huggingface.co/datasets/huggingface/documentation-images/resolve/main/diffusers/inpaint.png")
mask_image = load_image("https://huggingface.co/datasets/huggingface/documentation-images/resolve/main/diffusers/inpaint_mask.png")

generator = torch.Generator("cuda").manual_seed(92)
prompt = "concept art digital painting of an elven castle, inspired by lord of the rings, highly detailed, 8k"
image = pipeline(prompt=prompt, image=init_image, mask_image=mask_image, generator=generator).images[0]
make_image_grid([init_image, image], rows=1, cols=2)import torch
from diffusers import AutoPipelineForInpainting
from diffusers.utils import load_image, make_image_grid
pipeline = AutoPipelineForInpainting.from_pretrained(
"stable-diffusion-v1-5/stable-diffusion-inpainting", dtype=torch.float16, variant="fp16"
)
pipeline.enable_model_cpu_offload()
# remove following line if xFormers is not installed or you have PyTorch 2.0 or higher installed
pipeline.enable_xformers_memory_efficient_attention()
# load base and mask image
init_image = load_image("https://huggingface.co/datasets/huggingface/documentation-images/resolve/main/diffusers/inpaint.png")
mask_image = load_image("https://huggingface.co/datasets/huggingface/documentation-images/resolve/main/diffusers/inpaint_mask.png")
generator = torch.Generator("cuda").manual_seed(92)
prompt = "concept art digital painting of an elven castle, inspired by lord of the rings, highly detailed, 8k"
image = pipeline(prompt=prompt, image=init_image, mask_image=mask_image, generator=generator).images[0]
make_image_grid([init_image, image], rows=1, cols=2)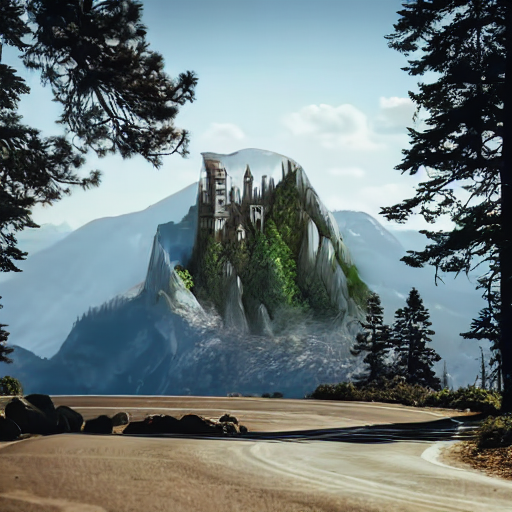
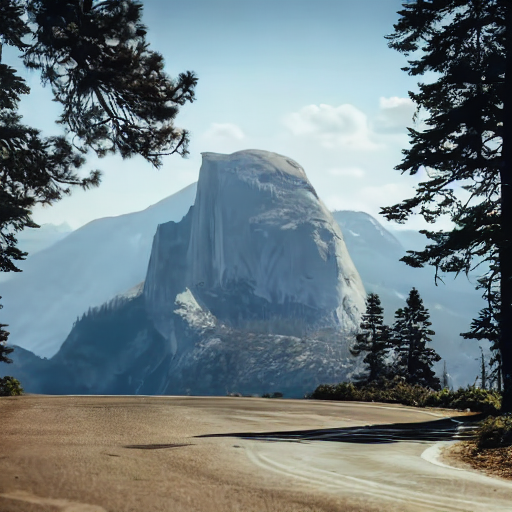
다만, 이미지에서 객체를 지우는 것과 같은 보다 기본적인 작업(예: 도로 위의 바위)의 경우, 일반 체크포인트로도 상당히 좋은 결과를 얻을 수 있습니다. 일반 체크포인트와 inpaint 체크포인트 사이의 차이가 그리 현저하지 않습니다.
import torch
from diffusers import AutoPipelineForInpainting
from diffusers.utils import load_image, make_image_grid

pipeline = AutoPipelineForInpainting.from_pretrained(
    "stable-diffusion-v1-5/stable-diffusion-v1-5", dtype=torch.float16, variant="fp16"
)
pipeline.enable_model_cpu_offload()
# remove following line if xFormers is not installed or you have PyTorch 2.0 or higher installed
pipeline.enable_xformers_memory_efficient_attention()

# load base and mask image
init_image = load_image("https://huggingface.co/datasets/huggingface/documentation-images/resolve/main/diffusers/inpaint.png")
mask_image = load_image("https://huggingface.co/datasets/huggingface/documentation-images/resolve/main/diffusers/road-mask.png")

image = pipeline(prompt="road", image=init_image, mask_image=mask_image).images[0]
make_image_grid([init_image, image], rows=1, cols=2)import torch
from diffusers import AutoPipelineForInpainting
from diffusers.utils import load_image, make_image_grid
pipeline = AutoPipelineForInpainting.from_pretrained(
"stable-diffusion-v1-5/stable-diffusion-inpainting", dtype=torch.float16, variant="fp16"
)
pipeline.enable_model_cpu_offload()
# remove following line if xFormers is not installed or you have PyTorch 2.0 or higher installed
pipeline.enable_xformers_memory_efficient_attention()
# load base and mask image
init_image = load_image("https://huggingface.co/datasets/huggingface/documentation-images/resolve/main/diffusers/inpaint.png")
mask_image = load_image("https://huggingface.co/datasets/huggingface/documentation-images/resolve/main/diffusers/road-mask.png")
image = pipeline(prompt="road", image=init_image, mask_image=mask_image).images[0]
make_image_grid([init_image, image], rows=1, cols=2)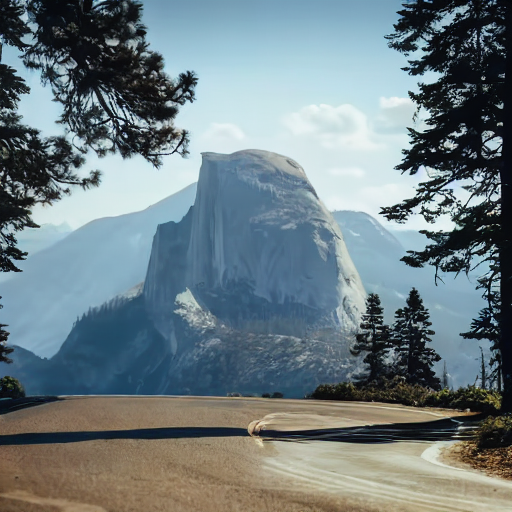
inpaint 전용이 아닌 체크포인트를 사용하는 트레이드오프는 전체 이미지 품질이 낮아질 수 있다는 점이지만, 일반적으로 마스크 영역을 유지하는 경향이 있습니다(마스크 윤곽이 보이는 이유입니다). inpaint 전용 체크포인트는 더 높은 품질의 inpaint 이미지를 생성하도록 의도적으로 학습되며, 이는 마스크 영역과 비마스크 영역 사이의 더 자연스러운 전환을 포함합니다. 그 결과, 이러한 체크포인트는 비마스크 영역을 변경할 가능성이 더 높습니다.
작업에서 마스킹되지 않은 영역을 보존하는 것이 중요하다면, VaeImageProcessor.apply_overlay() 메서드를 사용하여 마스킹된 영역과 마스킹되지 않은 영역 사이의 전환이 다소 부자연스러워지는 것을 감수하더라도 이미지의 마스킹되지 않은 영역이 동일하게 유지되도록 강제할 수 있습니다.
import PIL
import numpy as np
import torch

from diffusers import AutoPipelineForInpainting
from diffusers.utils import load_image, make_image_grid

device = "cuda"  # or "mps", "xpu", "cpu"
pipeline = AutoPipelineForInpainting.from_pretrained(
    "stable-diffusion-v1-5/stable-diffusion-inpainting",
    dtype=torch.float16,
    variant="fp16"
)
pipeline = pipeline.to(device)

img_url = "https://raw.githubusercontent.com/CompVis/latent-diffusion/main/data/inpainting_examples/overture-creations-5sI6fQgYIuo.png"
mask_url = "https://raw.githubusercontent.com/CompVis/latent-diffusion/main/data/inpainting_examples/overture-creations-5sI6fQgYIuo_mask.png"

init_image = load_image(img_url).resize((512, 512))
mask_image = load_image(mask_url).resize((512, 512))

prompt = "Face of a yellow cat, high resolution, sitting on a park bench"
repainted_image = pipeline(prompt=prompt, image=init_image, mask_image=mask_image).images[0]
repainted_image.save("repainted_image.png")

unmasked_unchanged_image = pipeline.image_processor.apply_overlay(mask_image, init_image, repainted_image)
unmasked_unchanged_image.save("force_unmasked_unchanged.png")
make_image_grid([init_image, mask_image, repainted_image, unmasked_unchanged_image], rows=2, cols=2)
파이프라인 매개변수 구성
이미지 품질과 “창의성”과 같은 이미지 특성은 파이프라인 매개변수에 따라 달라집니다. 원하는 결과를 얻기 위해 이러한 매개변수의 역할을 아는 것이 중요합니다. 가장 중요한 매개변수들을 살펴보고, 이를 변경할 때 출력이 어떻게 달라지는지 확인해 보겠습니다.
강도
strength는 기본 이미지에 추가되는 노이즈의 양을 나타내는 지표로, 출력 이미지가 기본 이미지와 얼마나 유사한지에 영향을 줍니다.
- 📈
strength값이 높을수록 이미지에 더 많은 노이즈가 추가되고 디노이징 과정이 더 오래 걸리지만, 베이스 이미지와 더 다른 더 높은 품질의 이미지를 얻을 수 있습니다 - 📉
strength값이 낮을수록 이미지에 추가되는 노이즈가 적고 디노이징 과정이 빨라지지만, 이미지 품질이 떨어질 수 있으며 생성된 이미지가 기본 이미지와 더 유사해집니다
import torch
from diffusers import AutoPipelineForInpainting
from diffusers.utils import load_image, make_image_grid

pipeline = AutoPipelineForInpainting.from_pretrained(
    "stable-diffusion-v1-5/stable-diffusion-inpainting", dtype=torch.float16, variant="fp16"
)
pipeline.enable_model_cpu_offload()
# remove following line if xFormers is not installed or you have PyTorch 2.0 or higher installed
pipeline.enable_xformers_memory_efficient_attention()

# load base and mask image
init_image = load_image("https://huggingface.co/datasets/huggingface/documentation-images/resolve/main/diffusers/inpaint.png")
mask_image = load_image("https://huggingface.co/datasets/huggingface/documentation-images/resolve/main/diffusers/inpaint_mask.png")

prompt = "concept art digital painting of an elven castle, inspired by lord of the rings, highly detailed, 8k"
image = pipeline(prompt=prompt, image=init_image, mask_image=mask_image, strength=0.6).images[0]
make_image_grid([init_image, mask_image, image], rows=1, cols=3)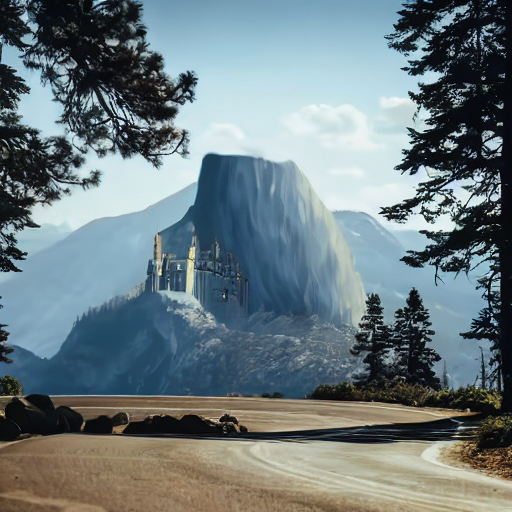
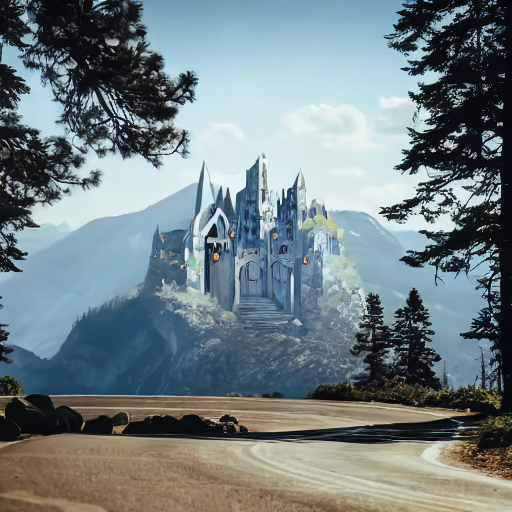
가이던스 스케일
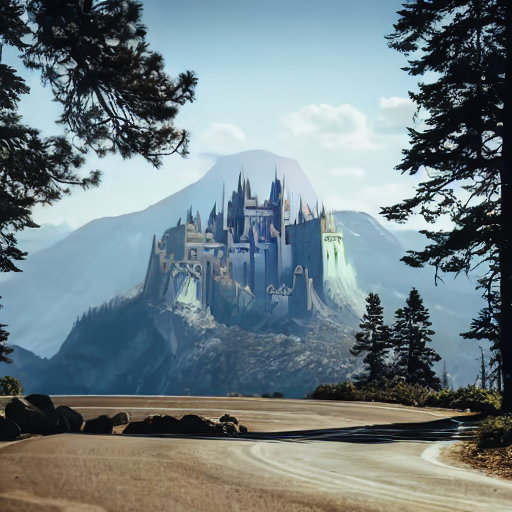
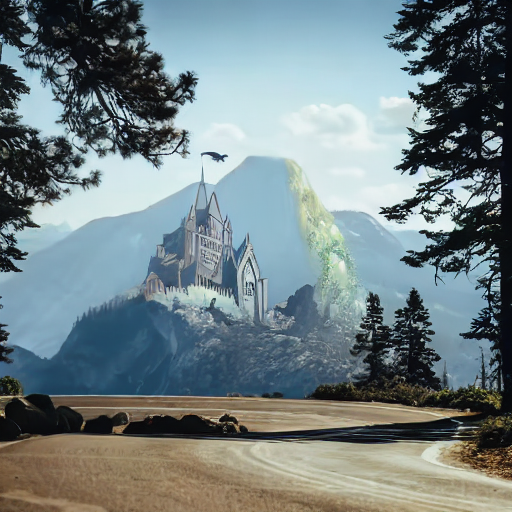
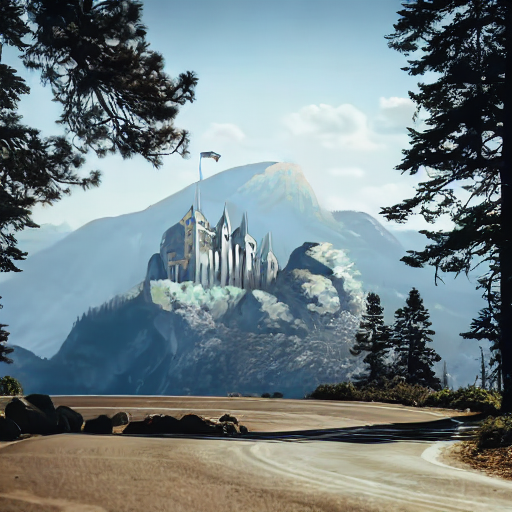
guidance_scale는 텍스트 프롬프트와 생성된 이미지의 정렬 정도에 영향을 줍니다.
- 📈
guidance_scale값이 높을수록 프롬프트와 생성된 이미지가 밀접하게 정렬되어, 프롬프트에 대한 더 엄격한 해석이 출력됩니다 - 📉
guidance_scale값이 낮을수록 프롬프트와 생성된 이미지의 정렬이 느슨해지므로, 프롬프트와 다른 더 다양한 결과가 나올 수 있습니다
strength와 guidance_scale을 함께 사용하여 모델의 표현력에 대한 더 세밀한 제어가 가능합니다. 예를 들어, strength와 guidance_scale 값을 모두 높게 설정하면 모델에 가장 큰 창의적 자유를 부여할 수 있습니다.
import torch
from diffusers import AutoPipelineForInpainting
from diffusers.utils import load_image, make_image_grid

pipeline = AutoPipelineForInpainting.from_pretrained(
    "stable-diffusion-v1-5/stable-diffusion-inpainting", dtype=torch.float16, variant="fp16"
)
pipeline.enable_model_cpu_offload()
# remove following line if xFormers is not installed or you have PyTorch 2.0 or higher installed
pipeline.enable_xformers_memory_efficient_attention()

# load base and mask image
init_image = load_image("https://huggingface.co/datasets/huggingface/documentation-images/resolve/main/diffusers/inpaint.png")
mask_image = load_image("https://huggingface.co/datasets/huggingface/documentation-images/resolve/main/diffusers/inpaint_mask.png")

prompt = "concept art digital painting of an elven castle, inspired by lord of the rings, highly detailed, 8k"
image = pipeline(prompt=prompt, image=init_image, mask_image=mask_image, guidance_scale=2.5).images[0]
make_image_grid([init_image, mask_image, image], rows=1, cols=3)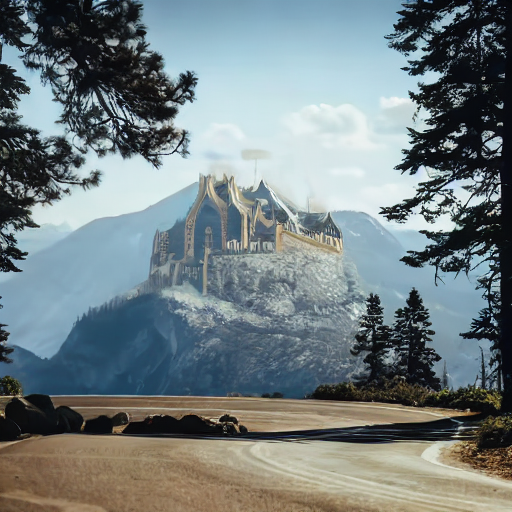
부정 프롬프트
네거티브 프롬프트는 프롬프트와 반대 역할을 수행하며, 이미지에서 특정 요소를 생성하지 않도록 모델을 유도합니다. 이는 이미지 품질을 빠르게 향상시키고 원하지 않는 요소가 생성되는 것을 방지하는 데 유용합니다.
import torch
from diffusers import AutoPipelineForInpainting
from diffusers.utils import load_image, make_image_grid

pipeline = AutoPipelineForInpainting.from_pretrained(
    "stable-diffusion-v1-5/stable-diffusion-inpainting", dtype=torch.float16, variant="fp16"
)
pipeline.enable_model_cpu_offload()
# remove following line if xFormers is not installed or you have PyTorch 2.0 or higher installed
pipeline.enable_xformers_memory_efficient_attention()

# load base and mask image
init_image = load_image("https://huggingface.co/datasets/huggingface/documentation-images/resolve/main/diffusers/inpaint.png")
mask_image = load_image("https://huggingface.co/datasets/huggingface/documentation-images/resolve/main/diffusers/inpaint_mask.png")

prompt = "concept art digital painting of an elven castle, inspired by lord of the rings, highly detailed, 8k"
negative_prompt = "bad architecture, unstable, poor details, blurry"
image = pipeline(prompt=prompt, negative_prompt=negative_prompt, image=init_image, mask_image=mask_image).images[0]
make_image_grid([init_image, mask_image, image], rows=1, cols=3)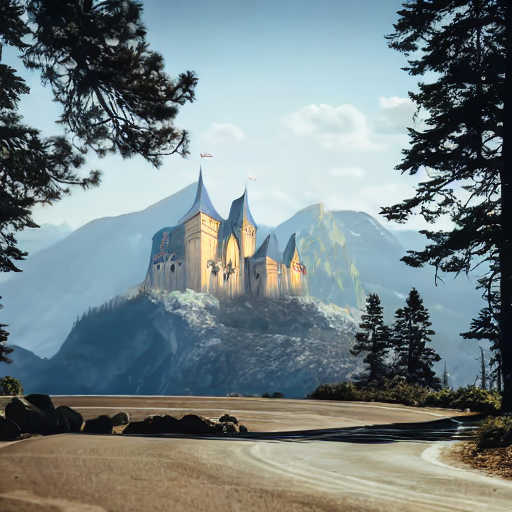
패딩 마스크 크롭
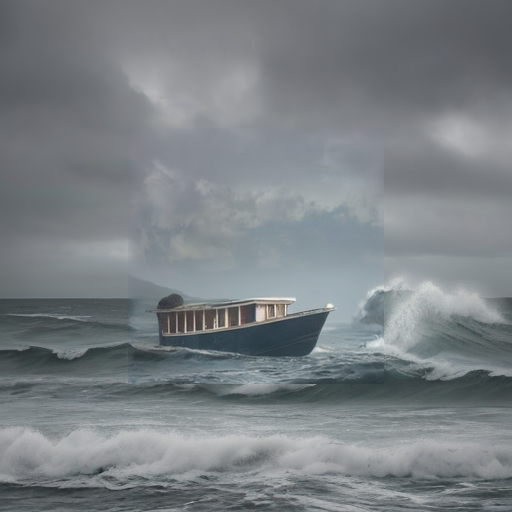
인페인팅 이미지 품질을 높이는 방법 중 하나는 padding_mask_crop 매개변수를 사용하는 것입니다. 이 옵션을 활성화하면 사용자가 지정한 패딩을 포함하여 마스킹된 영역을 잘라내고, 원본 이미지에서도 동일한 영역을 잘라냅니다. 이미지와 마스크 모두 인페인팅을 위해 더 높은 해상도로 업스케일링된 후 원본 이미지에 오버레이됩니다. 이는 StableDiffusionUpscalePipeline와 같은 별도의 파이프라인을 사용하지 않고도 이미지 품질을 빠르게 개선할 수 있는 간단한 방법입니다.
padding_mask_crop 매개변수를 pipeline 호출에 추가하고 원하는 패딩 값으로 설정하세요.
import torch
from diffusers import AutoPipelineForInpainting
from diffusers.utils import load_image
from PIL import Image

generator = torch.Generator(device='cuda').manual_seed(0)  # or "mps", "xpu", "cpu"
pipeline = AutoPipelineForInpainting.from_pretrained("stable-diffusion-v1-5/stable-diffusion-v1-5", dtype=torch.float16).to('cuda')

base = load_image("https://huggingface.co/datasets/YiYiXu/testing-images/resolve/main/seashore.png")
mask = load_image("https://huggingface.co/datasets/YiYiXu/testing-images/resolve/main/seashore_mask.png")

image = pipeline("boat", image=base, mask_image=mask, strength=0.75, generator=generator, padding_mask_crop=32).images[0]
image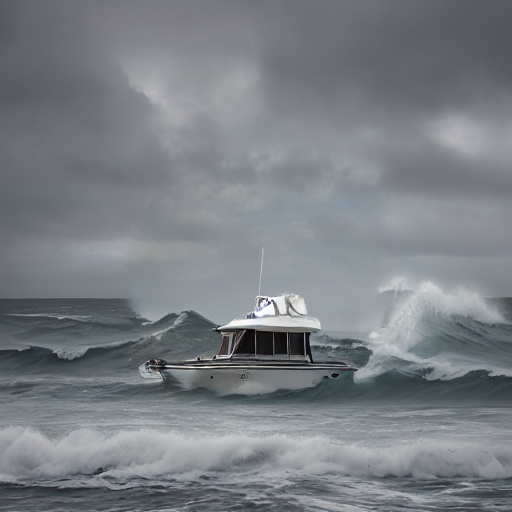
체인 인페인팅 파이프라인
AutoPipelineForInpainting는 다른 🤗 Diffusers 파이프라인과 연결하여 그 출력 결과를 편집하는 데 사용할 수 있습니다. 이는 다른 diffusion 파이프라인의 출력 품질을 개선하는 데 유용하며, 여러 파이프라인을 사용하는 경우 출력을 latent space에 유지하고 동일한 파이프라인 구성 요소를 재사용하도록 연결하면 메모리 효율성이 더 높아질 수 있습니다.
텍스트-이미지-인페인팅
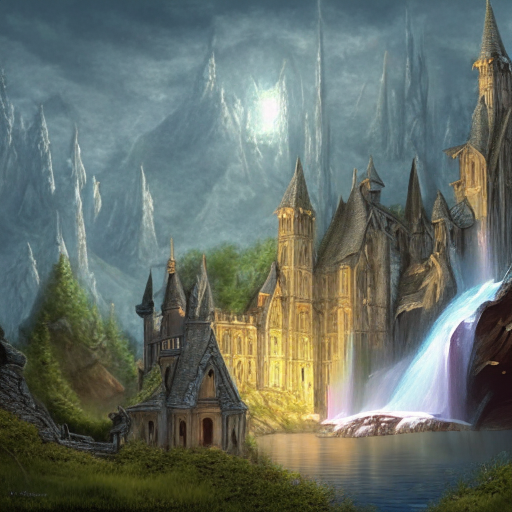
텍스트-이미지 생성 파이프라인과 인페인팅 파이프라인을 체이닝하면 생성된 이미지를 인페인팅할 수 있으며, 시작 시점에 베이스 이미지를 제공할 필요가 없습니다. 이를 통해 완전히 새로운 이미지를 생성하지 않고도 좋아하는 텍스트-이미지 생성 결과를 편집할 수 있어 편리합니다.
텍스트-이미지 파이프라인으로 성을 생성하는 것으로 시작해 보세요:
import torch
from diffusers import AutoPipelineForText2Image, AutoPipelineForInpainting
from diffusers.utils import load_image, make_image_grid

pipeline = AutoPipelineForText2Image.from_pretrained(
    "stable-diffusion-v1-5/stable-diffusion-v1-5", dtype=torch.float16, variant="fp16", use_safetensors=True
)
pipeline.enable_model_cpu_offload()
# remove following line if xFormers is not installed or you have PyTorch 2.0 or higher installed
pipeline.enable_xformers_memory_efficient_attention()

text2image = pipeline("concept art digital painting of an elven castle, inspired by lord of the rings, highly detailed, 8k").images[0]
위에서 생성된 출력의 마스크 이미지를 로드합니다:
mask_image = load_image("https://huggingface.co/datasets/huggingface/documentation-images/resolve/main/diffusers/inpaint_text-chain-mask.png")그리고 마스킹된 영역에 폭포를 inpaint 해 보겠습니다:
pipeline = AutoPipelineForInpainting.from_pretrained(
    "kandinsky-community/kandinsky-2-2-decoder-inpaint", dtype=torch.float16
)
pipeline.enable_model_cpu_offload()
# remove following line if xFormers is not installed or you have PyTorch 2.0 or higher installed
pipeline.enable_xformers_memory_efficient_attention()

prompt = "digital painting of a fantasy waterfall, cloudy"
image = pipeline(prompt=prompt, image=text2image, mask_image=mask_image).images[0]
make_image_grid([text2image, mask_image, image], rows=1, cols=3)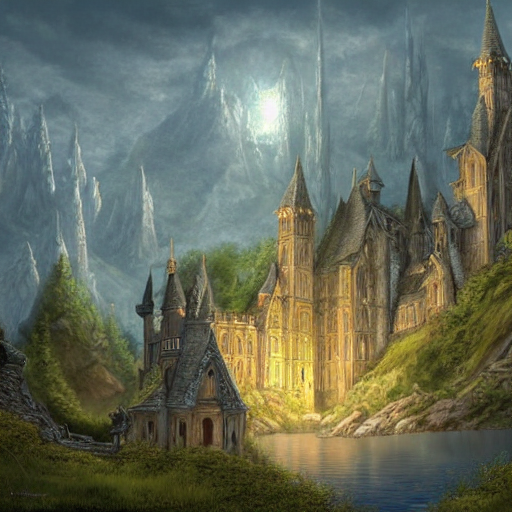
Inpaint-to-image-to-image
이미지-이미지 변환이나 업스케일러와 같은 다른 파이프라인 앞에 inpainting 파이프라인을 체인하여 품질을 향상시킬 수도 있습니다.
이미지 인페인팅으로 시작해 보세요:
import torch
from diffusers import AutoPipelineForInpainting, AutoPipelineForImage2Image
from diffusers.utils import load_image, make_image_grid

pipeline = AutoPipelineForInpainting.from_pretrained(
    "stable-diffusion-v1-5/stable-diffusion-inpainting", dtype=torch.float16, variant="fp16"
)
pipeline.enable_model_cpu_offload()
# remove following line if xFormers is not installed or you have PyTorch 2.0 or higher installed
pipeline.enable_xformers_memory_efficient_attention()

# load base and mask image
init_image = load_image("https://huggingface.co/datasets/huggingface/documentation-images/resolve/main/diffusers/inpaint.png")
mask_image = load_image("https://huggingface.co/datasets/huggingface/documentation-images/resolve/main/diffusers/inpaint_mask.png")

prompt = "concept art digital painting of an elven castle, inspired by lord of the rings, highly detailed, 8k"
image_inpainting = pipeline(prompt=prompt, image=init_image, mask_image=mask_image).images[0]

# resize image to 1024x1024 for SDXL
image_inpainting = image_inpainting.resize((1024, 1024))
이제 이미지를 SDXL의 refiner 모델을 사용하는 다른 inpainting 파이프라인에 전달하여 이미지 디테일과 품질을 향상시키겠습니다:
pipeline = AutoPipelineForInpainting.from_pretrained(
    "stabilityai/stable-diffusion-xl-refiner-1.0", dtype=torch.float16, variant="fp16"
)
pipeline.enable_model_cpu_offload()
# remove following line if xFormers is not installed or you have PyTorch 2.0 or higher installed
pipeline.enable_xformers_memory_efficient_attention()

image = pipeline(prompt=prompt, image=image_inpainting, mask_image=mask_image, output_type="latent").images[0]
파이프라인에서
output_type="latent"를 지정하는 것이 중요합니다. 이를 통해 모든 출력을 잠재 공간(latent space)에 유지하여 불필요한 디코딩-인코딩 단계를 피할 수 있습니다. 이는 체인된 파이프라인이 동일한 VAE를 사용하는 경우에만 작동합니다. 예를 들어, Text-to-image-to-inpaint 섹션에서 Kandinsky 2.2는 Stable Diffusion 모델과 다른 VAE 클래스를 사용하므로 작동하지 않습니다. 하지만 두 파이프라인 모두에 Stable Diffusion v1.5를 사용하면, 두 모델이 모두 AutoencoderKL을 사용하므로 모든 것을 잠재 공간에 유지할 수 있습니다.
마지막으로, 이 이미지를 이미지-투-이미지 파이프라인에 전달하여 마무리 작업을 수행할 수 있습니다. 기존 파이프라인 구성 요소를 재사용하고 모든 파이프라인 구성 요소를 메모리에 다시 로드하는 비효율을 피하기 위해 from_pipe() 메서드를 사용하는 것이 더 효율적입니다.
pipeline = AutoPipelineForImage2Image.from_pipe(pipeline)
# remove following line if xFormers is not installed or you have PyTorch 2.0 or higher installed
pipeline.enable_xformers_memory_efficient_attention()

image = pipeline(prompt=prompt, image=image).images[0]
make_image_grid([init_image, mask_image, image_inpainting, image], rows=2, cols=2) 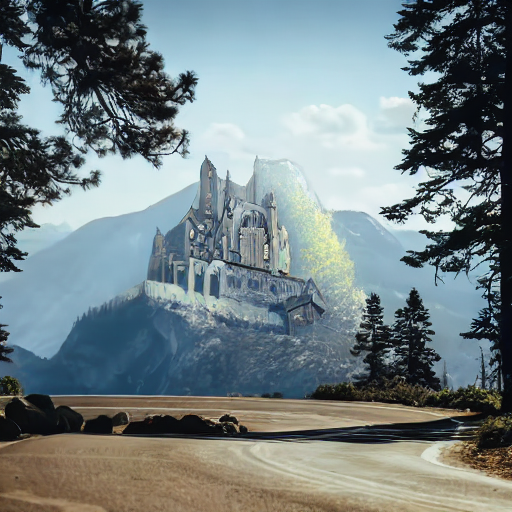
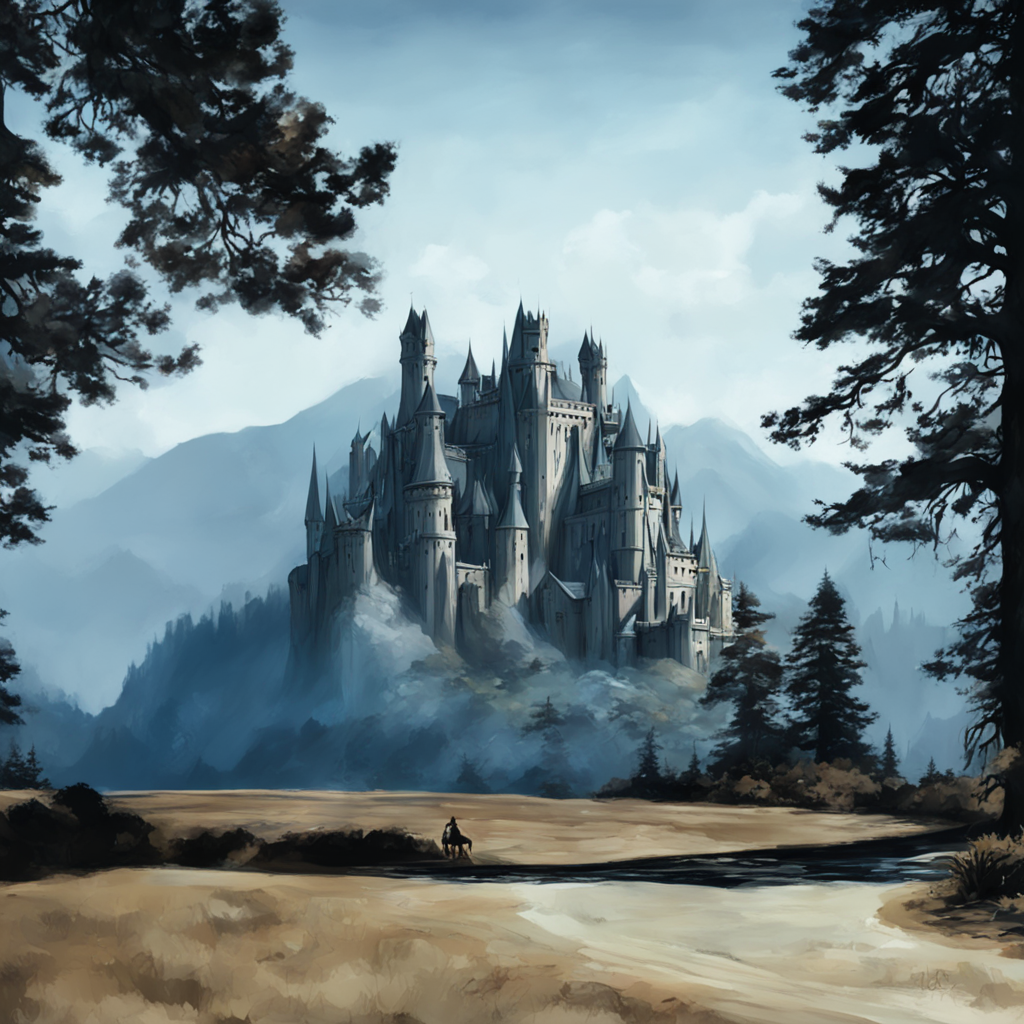
이미지-이미지 변환과 인페인팅은 실제로 매우 유사한 작업입니다. 이미지-이미지 변환은 제공된 기존 이미지와 유사한 새로운 이미지를 생성합니다. 인페인팅도 동일한 작업을 수행하지만, 마스크로 정의된 이미지 영역만 변환하고 이미지의 나머지 부분은 변경되지 않습니다. 인페인팅은 특정 변경 사항을 만드는 데 더 정밀한 도구라고 생각할 수 있으며, 이미지-이미지 변환은 더 광범위한 변경 사항을 만드는 데 더 넓은 범위를 가집니다.
이미지 생성 제어
negative_prompt와 같은 매개변수를 구성하여 생성의 특정 측면을 제어할 수는 있지만, 노이즈 제거 과정이 무작위적이기 때문에 이미지를 원하는 대로 정확하게 만드는 것은 어렵습니다. 이미지 생성을 제어하는 더 좋고 효율적인 방법이 있습니다.
프롬프트 가중치
Prompt weighting은 프롬프트 내 개념의 표현을 정량적으로 조절하는 방법입니다. 이를 통해 프롬프트의 각 개념에 대한 텍스트 임베딩 벡터의 크기를 증가 또는 감소시킬 수 있으며, 이는 각 개념이 생성되는 정도를 결정합니다. Compel 라이브러리는 프롬프트 가중치를 조절하고 임베딩을 생성하는 직관적인 구문을 제공합니다. 임베딩을 생성하는 방법은 Prompt weighting 가이드에서 확인하세요.
임베딩을 생성한 후에는 AutoPipelineForInpainting의 prompt_embeds 매개변수(네거티브 프롬프트를 사용하는 경우 negative_prompt_embeds 포함)에 전달합니다. 임베딩은 prompt 매개변수를 대체합니다:
import torch
from diffusers import AutoPipelineForInpainting
from diffusers.utils import make_image_grid

pipeline = AutoPipelineForInpainting.from_pretrained(
    "stable-diffusion-v1-5/stable-diffusion-inpainting", dtype=torch.float16,
)
pipeline.enable_model_cpu_offload()
# remove following line if xFormers is not installed or you have PyTorch 2.0 or higher installed
pipeline.enable_xformers_memory_efficient_attention()

image = pipeline(prompt_embeds=prompt_embeds, # generated from Compel
    negative_prompt_embeds=negative_prompt_embeds, # generated from Compel
    image=init_image,
    mask_image=mask_image
).images[0]
make_image_grid([init_image, mask_image, image], rows=1, cols=3)
ControlNet
ControlNet 모델은 Stable Diffusion과 같은 다른 diffusion 모델과 함께 사용되며, 이미지가 생성되는 방식을 제어하는 데 더 유연하고 정확한 방법을 제공합니다. ControlNet은 diffusion 모델이 해당 이미지의 특징을 유지하도록 안내하는 추가적인 conditioning image 입력을 받아들입니다.
예를 들어, inpaint 이미지로 사전 학습된 ControlNet을 사용하여 이미지를 조건화해 보겠습니다:
import torch
import numpy as np
from diffusers import ControlNetModel, StableDiffusionControlNetInpaintPipeline
from diffusers.utils import load_image, make_image_grid

# load ControlNet
controlnet = ControlNetModel.from_pretrained("lllyasviel/control_v11p_sd15_inpaint", dtype=torch.float16, variant="fp16")

# pass ControlNet to the pipeline
pipeline = StableDiffusionControlNetInpaintPipeline.from_pretrained(
    "stable-diffusion-v1-5/stable-diffusion-inpainting", controlnet=controlnet, dtype=torch.float16, variant="fp16"
)
pipeline.enable_model_cpu_offload()
# remove following line if xFormers is not installed or you have PyTorch 2.0 or higher installed
pipeline.enable_xformers_memory_efficient_attention()

# load base and mask image
init_image = load_image("https://huggingface.co/datasets/huggingface/documentation-images/resolve/main/diffusers/inpaint.png")
mask_image = load_image("https://huggingface.co/datasets/huggingface/documentation-images/resolve/main/diffusers/inpaint_mask.png")

# prepare control image
def make_inpaint_condition(init_image, mask_image):
    init_image = np.array(init_image.convert("RGB")).astype(np.float32) / 255.0
    mask_image = np.array(mask_image.convert("L")).astype(np.float32) / 255.0

    assert init_image.shape[0:1] == mask_image.shape[0:1], "image and image_mask must have the same image size"
    init_image[mask_image > 0.5] = -1.0  # set as masked pixel
    init_image = np.expand_dims(init_image, 0).transpose(0, 3, 1, 2)
    init_image = torch.from_numpy(init_image)
    return init_image

control_image = make_inpaint_condition(init_image, mask_image)
base, mask, control 이미지로부터 이미지를 생성합니다. 생성된 이미지에서 base 이미지의 특징이 강하게 보존되는 것을 확인할 수 있습니다.
prompt = "concept art digital painting of an elven castle, inspired by lord of the rings, highly detailed, 8k"
image = pipeline(prompt=prompt, image=init_image, mask_image=mask_image, control_image=control_image).images[0]
make_image_grid([init_image, mask_image, PIL.Image.fromarray(np.uint8(control_image[0][0])).convert('RGB'), image], rows=2, cols=2)
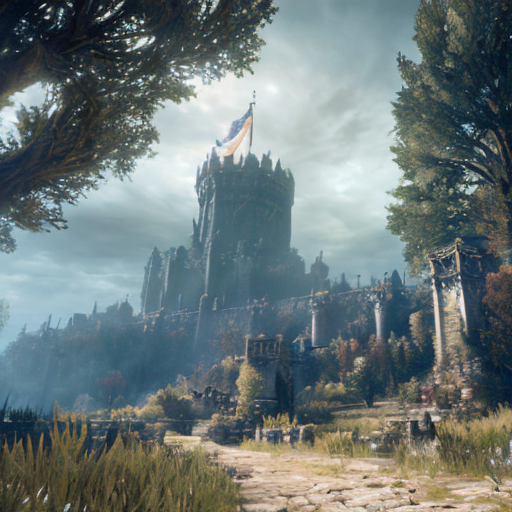
이것을 한 단계 더 나아가서 이미지-투-이미지 파이프라인과 체인하여 새로운 스타일을 적용할 수 있습니다:
from diffusers import AutoPipelineForImage2Image

pipeline = AutoPipelineForImage2Image.from_pretrained(
    "nitrosocke/elden-ring-diffusion", dtype=torch.float16,
)
pipeline.enable_model_cpu_offload()
# remove following line if xFormers is not installed or you have PyTorch 2.0 or higher installed
pipeline.enable_xformers_memory_efficient_attention()

prompt = "elden ring style castle" # include the token "elden ring style" in the prompt
negative_prompt = "bad architecture, deformed, disfigured, poor details"

image_elden_ring = pipeline(prompt, negative_prompt=negative_prompt, image=image).images[0]
make_image_grid([init_image, mask_image, image, image_elden_ring], rows=2, cols=2) 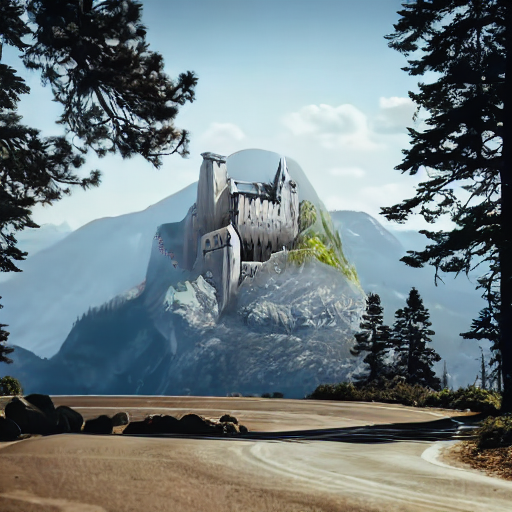
최적화
리소스가 제한된 환경에서 diffusion 모델을 실행하는 것은 어렵고 느릴 수 있지만, 몇 가지 최적화 트릭을 활용하면 그렇지 않아도 됩니다. 활성화할 수 있는 가장 크고(또는 가장 쉬운) 최적화 중 하나는 memory-efficient attention으로 전환하는 것입니다. PyTorch 2.0을 사용하는 경우 scaled-dot product attention이 자동으로 활성화되므로 다른 작업은 필요하지 않습니다. PyTorch 2.0을 사용하지 않는 경우, xFormers의 memory-efficient attention 구현을 설치하고 사용할 수 있습니다. 두 옵션 모두 메모리 사용량을 줄이고 추론을 가속화합니다.
모델을 CPU로 오프로드하여 더 많은 메모리를 절약할 수도 있습니다:
+ pipeline.enable_xformers_memory_efficient_attention()
+ pipeline.enable_model_cpu_offload()
추론 코드의 속도를 더 빠르게 높이기 위해 torch_compile을 사용하세요. 파이프라인에서 가장 연산이 집중되는 구성 요소, 일반적으로 UNet인 부분을 torch.compile으로 감싸야 합니다:
pipeline.unet = torch.compile(pipeline.unet, mode="reduce-overhead", fullgraph=True)메모리 사용량 줄이기 및 추론 가속화 가이드에서 자세히 알아보세요.
Update on GitHub