
Transformers documentation
画像・テキストからテキストへ
画像・テキストからテキストへ
画像とテキストを入力として受け取るモデル、すなわちビジョン言語モデル(VLM)は、画像を入力として受け取る言語モデルです。これらのモデルは、視覚的質問応答から画像セグメンテーションまで、さまざまなタスクに対応できます。このタスクは画像からテキストへの変換と多くの点で共通していますが、画像キャプション生成のような重複するユースケースもあります。画像からテキストへの変換モデルは画像のみを入力として受け取り、特定のタスクを達成する傾向がありますが、VLMはオープンエンドなテキストと画像の両方を入力として受け取り、より汎用的なモデルです。
このガイドでは、VLMの概要を簡潔に紹介し、Transformersを使用して推論を行う方法を説明します。
まず、VLMには複数のタイプがあります。
- ファインチューニングに使用されるベースモデル
- 対話用のファインチューニング済みモデル
- 指示ファインチューニング済みモデル
このガイドでは、指示チューニング済みモデルを用いた推論に焦点を当てます。
依存関係のインストールから始めましょう。
pip install -q transformers accelerate
pip install flash-attn --no-build-isolation
モデルとプロセッサを初期化しましょう。
from transformers import AutoProcessor, AutoModelForImageTextToText
from accelerate import Accelerator
import torch

device = Accelerator().device
model = AutoModelForImageTextToText.from_pretrained(
    "Qwen/Qwen3-VL-4B-Instruct",
    dtype=torch.bfloat16,
    attn_implementation="flash_attention_2",
).to(device)
Qwen3-VL や Qwen3.5 などの動的解像度モデルは、デフォルトで約 16MP の
longest_edgeを使用します。これにより、1 枚の画像から 10,000 個以上のビジュアルトークンが生成され、推論が停止したり、コンシューマー向け GPU で OOM が発生したりする可能性があります。この上限を設定するには、プロセッサを読み込む際にmin_pixelsとmax_pixelsを指定してください。
processor = AutoProcessor.from_pretrained(
    "Qwen/Qwen3-VL-4B-Instruct",
    min_pixels=224 * 224,
    max_pixels=1024 * 1024,
)このモデルには、ユーザーがチャット出力を解析するのを助けるチャットテンプレートが用意されています。さらに、このモデルは1回の会話やメッセージ内で複数の画像を入力として受け入れることもできます。ここでは、入力の準備を行います。
画像のインプットは以下のようになります。

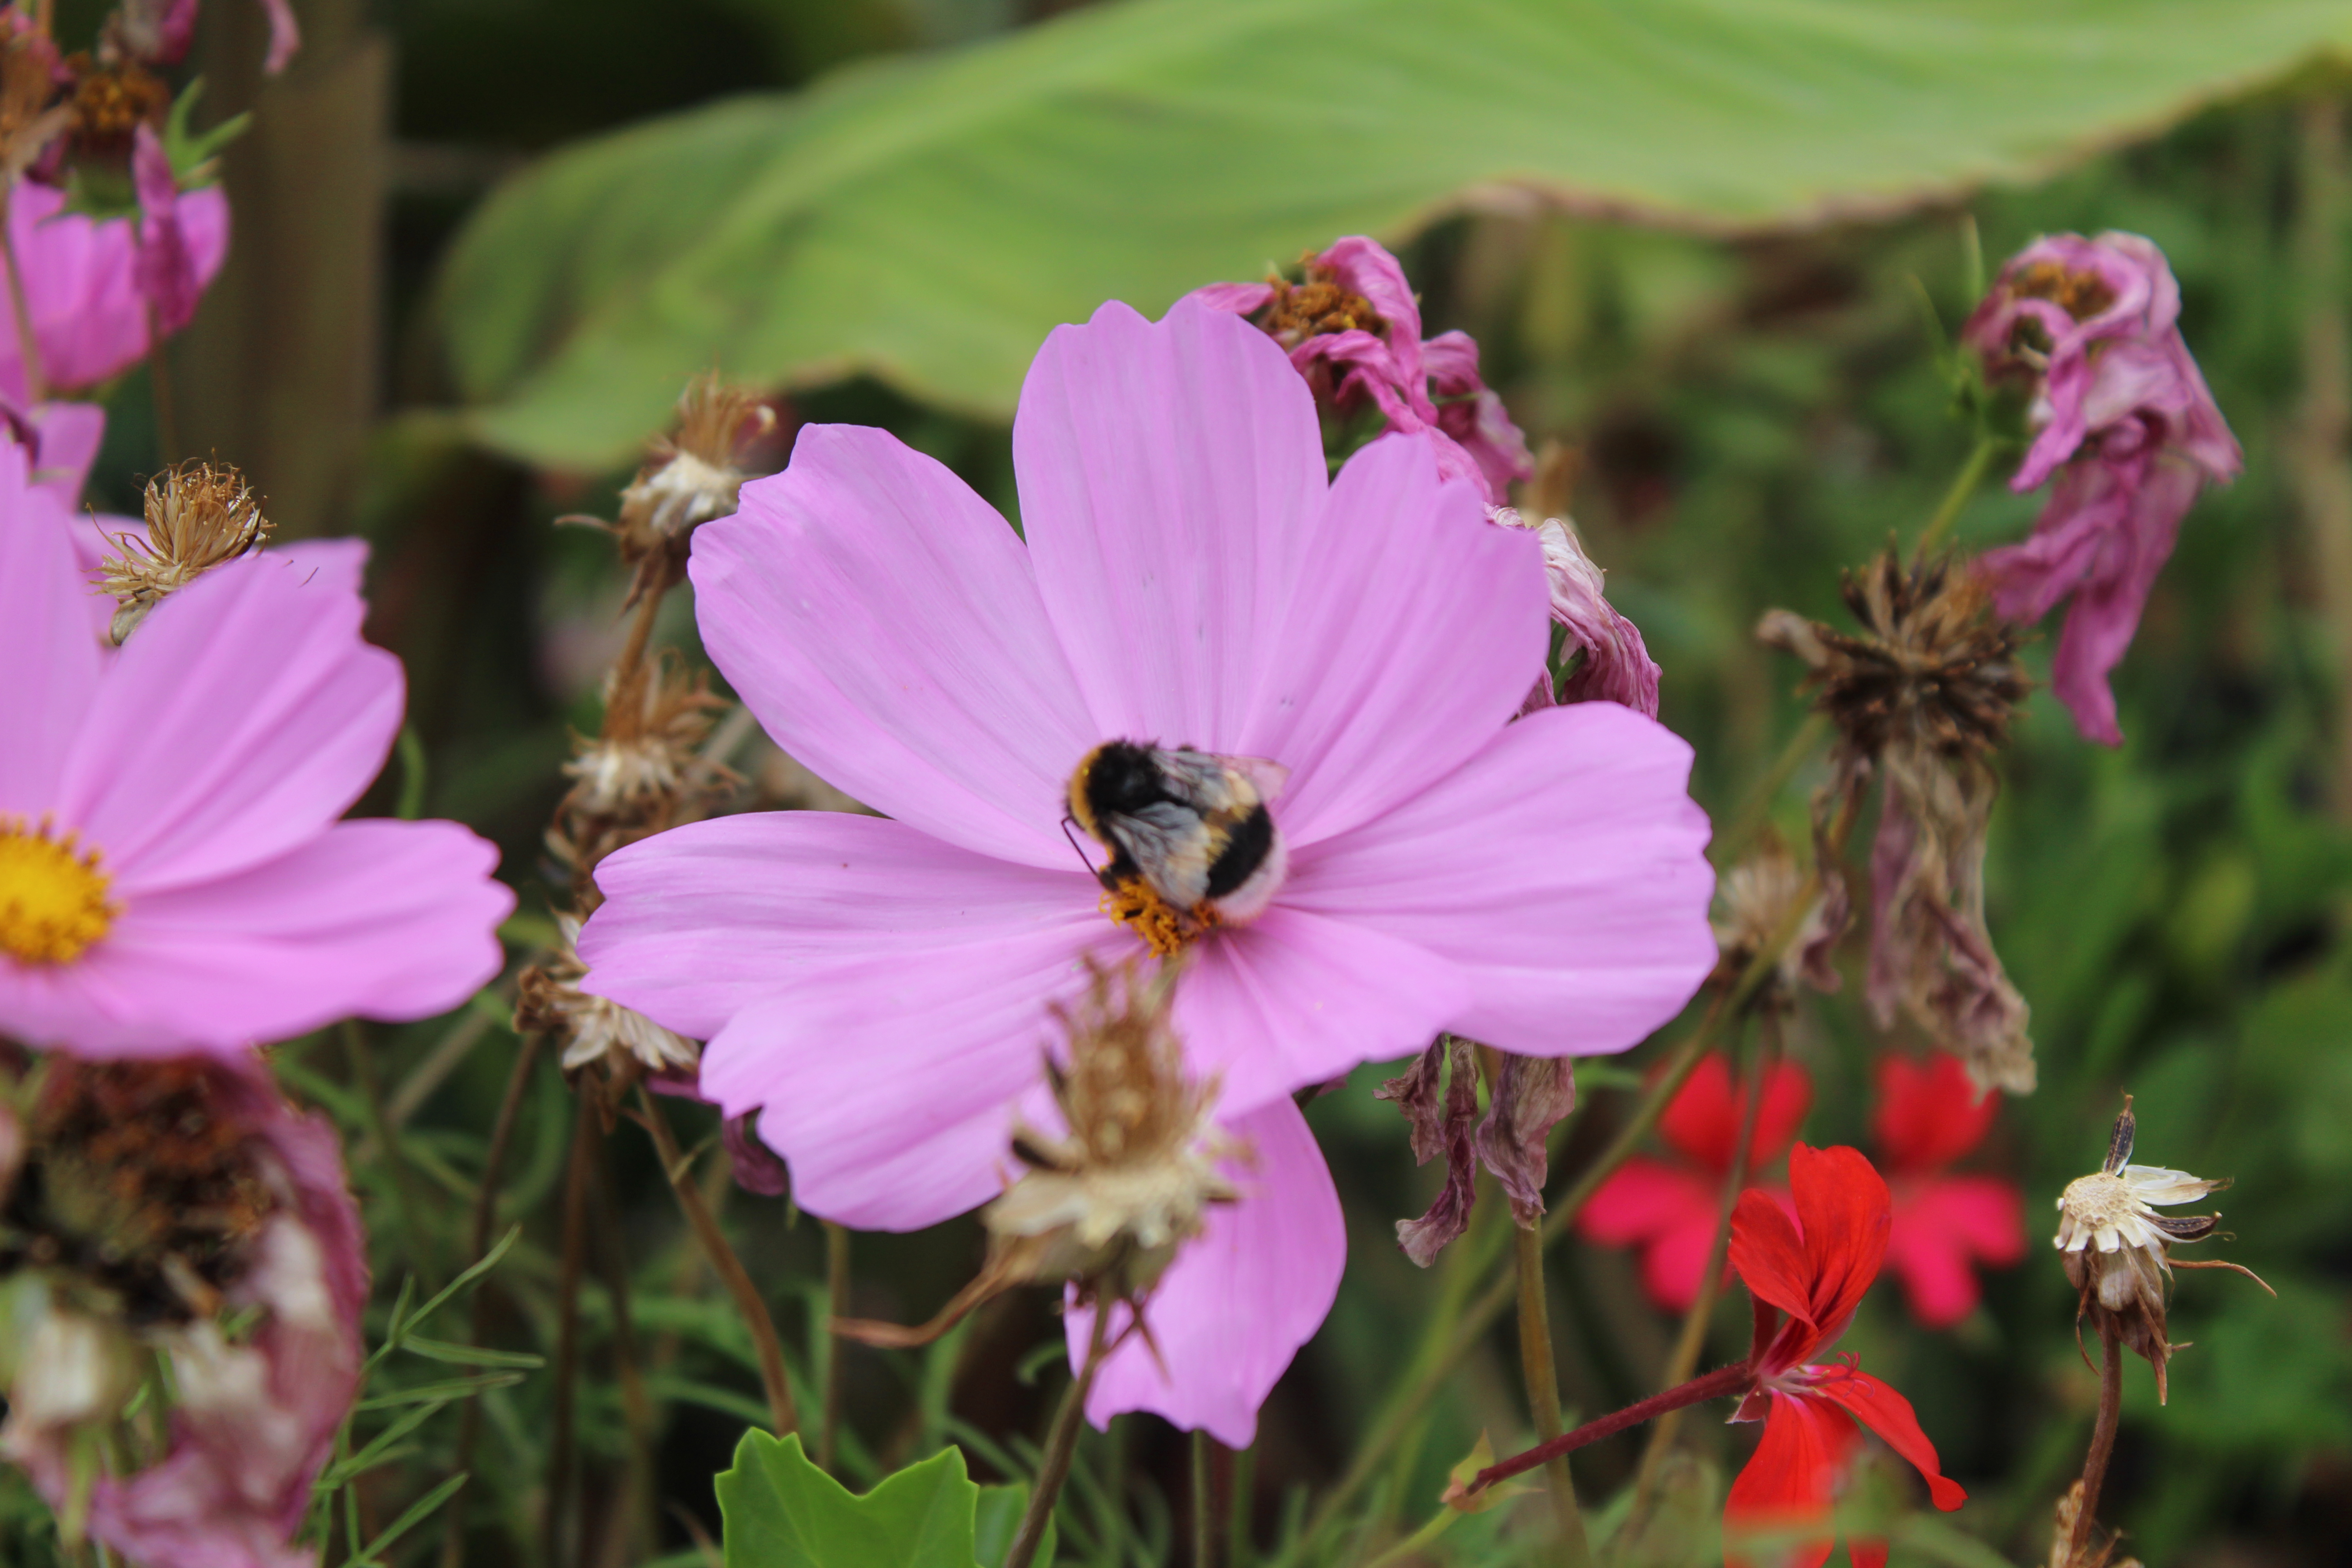
画像とテキストの両方を単一のプロンプトに含める場合、以下の例のように会話を構成してください。
messages = [
    {
        "role": "user",
        "content": [
            {"type": "image", "image": "https://huggingface.co/datasets/huggingface/documentation-images/resolve/main/cats.png"},
            {"type": "text", "text": "What do we see in this image?"},
        ]
    }
]
user と assistant のロールを交互に使用し、モデルに過去のコンテキストを付与することで、より良い応答を生成します。
messages = [
    {
        "role": "user",
        "content": [
            {"type": "image", "image": "https://huggingface.co/datasets/huggingface/documentation-images/resolve/main/cats.png"},
            {"type": "text", "text": "What do we see in this image?"},
        ]
    },
    {
        "role": "assistant",
        "content": [
            {"type": "text", "text": "In this image we can see two cats on the nets."},
        ]
    },
    {
        "role": "user",
        "content": [
            {"type": "image", "image": "https://huggingface.co/datasets/huggingface/documentation-images/resolve/main/bee.jpg"},
            {"type": "text", "text": "And how about this image?"},
        ]
    },
]
次に、プロセッサの apply_chat_template() メソッドを呼び出し、出力と画像入力を前処理します。
inputs = processor.apply_chat_template(messages, add_generation_prompt=True, tokenize=True, return_dict=True, return_tensors="pt").to(device)これで、前処理済みの入力をモデルに渡すことができます。
input_len = len(inputs.input_ids[0])

with torch.no_grad():
    generated_ids = model.generate(**inputs, max_new_tokens=200)
generated_texts = processor.batch_decode(generated_ids[:, input_len:], skip_special_tokens=True)

print(generated_texts)
## ['In this image we can see flowers, plants and insect.']
パイプライン
最も簡単な始め方は、Pipeline API を使用することです。"image-text-to-text" タスクと、使用するモデルを指定してください。
from transformers import pipeline
pipe = pipeline("image-text-to-text", model="llava-hf/llava-interleave-qwen-0.5b-hf")
以下の例では、chat templatesを使用してテキスト入力を整形しています。
messages = [
     {
         "role": "user",
         "content": [
             {
                 "type": "image",
                 "image": "https://huggingface.co/datasets/huggingface/documentation-images/resolve/main/bee.jpg",
             },
             {"type": "text", "text": "Describe this image."},
         ],
     },
     {
         "role": "assistant",
         "content": [
             {"type": "text", "text": "There's a pink flower"},
         ],
     },
]チャットテンプレートで整形されたテキストと画像をPipelineに渡し、return_full_text=Falseを設定して、生成された出力から入力を除去します。
outputs = pipe(text=messages, max_new_tokens=20, return_full_text=False)
outputs[0]["generated_text"]
#  with a yellow center in the foreground. The flower is surrounded by red and white flowers with green stems
ご希望に応じて、画像を個別に読み込み、以下のようにパイプラインに渡すこともできます。
import requests
from PIL import Image
from transformers import pipeline

pipe = pipeline("image-text-to-text", model="HuggingFaceTB/SmolVLM-256M-Instruct")

img_urls = [
    "https://huggingface.co/datasets/huggingface/documentation-images/resolve/main/cats.png",
    "https://huggingface.co/datasets/huggingface/documentation-images/resolve/main/bee.jpg",
]
images = [
    Image.open(requests.get(img_urls[0], stream=True).raw),
    Image.open(requests.get(img_urls[1], stream=True).raw),
]

messages = [
    {
        "role": "user",
        "content": [
            {"type": "image"},
            {"type": "image"},
            {"type": "text", "text": "What do you see in these images?"},
        ],
    }
]
outputs = pipe(text=messages, images=images, max_new_tokens=50, return_full_text=False)
outputs[0]["generated_text"]
" In the first image, there are two cats sitting on a plant. In the second image, there are flowers with a pinkish hue."出力の"input_text"フィールドには、引き続き画像が含まれます:
outputs[0]['input_text']
"""
[{'role': 'user',
  'content': [{'type': 'image',
    'image': <PIL.PngImagePlugin.PngImageFile image mode=RGBA size=622x412>},
   {'type': 'image',
    'image': <PIL.JpegImagePlugin.JpegImageFile image mode=RGB size=5184x3456>},
   {'type': 'text', 'text': 'What do you see in these images?'}]}]
"""
ストリーミング
より良い生成体験のためにテキストストリーミングを使用できます。TransformersはTextStreamerまたはTextIteratorStreamerクラスによるストリーミングをサポートしています。ここではIDEFICS-8BにTextIteratorStreamerを使用します。
チャット履歴を保持し、新しいユーザー入力を取得するアプリケーションがあるとします。通常どおり入力を前処理し、TextIteratorStreamer を初期化して、別スレッドで生成を処理します。これにより、生成されたテキストのトークンをリアルタイムでストリーミングできます。TextIteratorStreamer には、任意の生成引数を渡すことができます。
import time
from transformers import TextIteratorStreamer
from threading import Thread

def model_inference(
    user_prompt,
    chat_history,
    max_new_tokens,
    images
):
    user_prompt = {
        "role": "user",
        "content": [
            {"type": "image"},
            {"type": "text", "text": user_prompt},
        ]
    }
    chat_history.append(user_prompt)
    streamer = TextIteratorStreamer(
        processor.tokenizer,
        skip_prompt=True,
        timeout=5.0,
    )

    generation_args = {
        "max_new_tokens": max_new_tokens,
        "streamer": streamer,
        "do_sample": False
    }

    # add_generation_prompt=True makes model generate bot response
    prompt = processor.apply_chat_template(chat_history, add_generation_prompt=True)
    inputs = processor(
        text=prompt,
        images=images,
        return_tensors="pt",
    ).to(device)
    generation_args.update(inputs)

    thread = Thread(
        target=model.generate,
        kwargs=generation_args,
    )
    thread.start()

    acc_text = ""
    for text_token in streamer:
        time.sleep(0.04)
        acc_text += text_token
        if acc_text.endswith("<end_of_utterance>"):
            acc_text = acc_text[:-18]
        yield acc_text

thread.join()では、作成したmodel_inference関数を呼び出して、値をストリーミングします。
generator = model_inference(
    user_prompt="And what is in this image?",
    chat_history=messages[:2],
    max_new_tokens=100,
    images=images
)

for value in generator:
  print(value)

# In
# In this
# In this image ...
より小規模なハードウェアでモデルを学習
VLMは通常サイズが大きく、より小規模なハードウェアに収まるよう最適化が必要です。Transformersは多くのモデル量子化ライブラリをサポートしており、ここではQuantoを用いたint8量子化のみを説明します。int8量子化は、すべての重みが量子化される場合、最大75パーセントのメモリ改善をもたらします。ただし、8ビットはCUDAネイティブの精度ではないため、重みはオンザフライで量子化と逆量子化を繰り返され、レイテンシが増加します。
まず、依存関係をインストールします。
pip install -U optimum-quanto bitsandbytes
モデルの読み込み時に量子化を行うには、まずQuantoConfigを作成する必要があります。その後、通常どおりモデルを読み込みますが、モデルの初期化時にquantization_configを渡します。
from transformers import AutoModelForImageTextToText, QuantoConfig

model_id = "Qwen/Qwen3-VL-4B-Instruct"
quantization_config = QuantoConfig(weights="int8")
quantized_model = AutoModelForImageTextToText.from_pretrained(
    model_id, device_map="auto", quantization_config=quantization_config
)

messages = [
    {
        "role": "user",
        "content": [
            {"type": "image", "image": "https://huggingface.co/datasets/huggingface/documentation-images/resolve/main/cats.png"},
            {"type": "text", "text": "What do we see in this image?"},
        ]
    },
]
inputs = processor.apply_chat_template(messages, add_generation_prompt=True, tokenize=True, return_dict=True, return_tensors="pt").to(quantized_model.device)
input_len = len(inputs.input_ids[0])

with torch.no_grad():
    generated_ids = quantized_model.generate(**inputs, cache_implementation="static", max_new_tokens=100)
generated_texts = processor.batch_decode(generated_ids[:, input_len:], skip_special_tokens=True)

print(generated_texts[0])
## ['In this image, we see two tabby cats resting on a large, tangled pile of fishing nets. The nets are a mix of brown, orange, and red colors, with some blue and green ropes visible in the background. The cats appear relaxed and comfortable, nestled into the fibers of the nets. One cat is in the foreground, looking slightly to the side, while the other is positioned further back, looking directly at the camera. The scene suggests a coastal or fishing-related setting, possibly near']
これで完了です。モデルは変更なしで同じように使用できます。
キャッシュを用いた反復チャット
マルチモーダルなチャットエージェントを構築している場合、ターン間で同じ画像やオーディオを渡していることが多いでしょう。Cachingにより、毎回再処理する代わりに、エンコードされた表現を再利用でき、冗長な計算を削減できます。
テキスト専用モデルと同様に、マルチモーダルモデルもチャットテンプレートによって対話履歴を追跡します。主な違いは、チャットテンプレートを"text"形式でのみ適用し、新しいマルチモーダルコンテンツは別途処理することです。テンプレートを処理を伴って適用すると、Jinja が以前エンコードされた入力と新しい入力を区別できないため、ターンごとに会話全体が再処理されてしまいます。
以下の例はこのパターンを示しています。テキスト専用モデルについては、反復生成ガイドを参照してください。
このパターンを示すシンプルな Python の例を以下に示します。テキスト専用モデルの例については、このガイドを参照してください。
import torch
from transformers import AutoProcessor, Gemma4ForConditionalGeneration, TextStreamer
from transformers.cache_utils import DynamicCache
from transformers.image_utils import load_image
from transformers.audio_utils import load_audio

model_id = 'google/gemma-4-E2B-it'
processor = AutoProcessor.from_pretrained(model_id)
model = Gemma4ForConditionalGeneration.from_pretrained(model_id, dtype=torch.float32, device_map='cpu')

past_key_values = DynamicCache()
streamer = TextStreamer(processor.tokenizer, skip_prompt=True, skip_special_tokens=True)

## Turn 1: multimodal input (text + image + audio)
audio = load_audio("https://huggingface.co/datasets/Xenova/transformers.js-docs/resolve/main/jfk.wav")
image = load_image("https://huggingface.co/datasets/huggingface/documentation-images/resolve/main/bee.jpg")
messages = [
    {
        "role": "user",
        "content": [
            {"type": "text", "text": "In detail, describe the following audio and image."},
            {"type": "audio"},
            {"type": "image"},
        ],
    },
]
input_string = processor.apply_chat_template(messages, add_generation_prompt=True, tokenize=False)
inputs = processor(text=input_string, images=[image], audio=[audio], return_tensors='pt')
output = model.generate(**inputs, past_key_values=past_key_values, max_new_tokens=1024, do_sample=False, streamer=streamer)
first_response = processor.decode(output[0][inputs['input_ids'].shape[1]:], skip_special_tokens=True)

## Turn 2: text-only follow-up (reuses KV cache, no new media)
messages.append({"role": "assistant", "content": [{"type": "text", "text": first_response}]})
cached_string = processor.apply_chat_template(messages, tokenize=False)
messages.append({"role": "user", "content": [{"type": "text", "text": "Summarize the previous descriptions in one sentence."}]})
full_string = processor.apply_chat_template(messages, add_generation_prompt=True, tokenize=False)
new_string = full_string[len(cached_string):]

new_input_ids = processor.tokenizer(new_string, add_special_tokens=False, return_tensors='pt')['input_ids']
# Build and pass an attention mask only if batched input or there is padding
# attention_mask = torch.ones(1, past_key_values.get_seq_length() + new_input_ids.shape[1], dtype=torch.long)

output2 = model.generate(input_ids=new_input_ids, past_key_values=past_key_values, max_new_tokens=1024, do_sample=False, streamer=streamer)
second_response = processor.decode(output2[0][new_input_ids.shape[1]:], skip_special_tokens=True)

## Turn 3: new image (must go through processor for image token expansion + encoding)
image2 = load_image("https://huggingface.co/datasets/Xenova/transformers.js-docs/resolve/main/artemis.jpeg")
messages.append({"role": "assistant", "content": [{"type": "text", "text": second_response}]})
cached_string2 = processor.apply_chat_template(messages, tokenize=False)
messages.append({"role": "user", "content": [{"type": "text", "text": "Describe this image."}, {"type": "image"}]})
full_string2 = processor.apply_chat_template(messages, add_generation_prompt=True, tokenize=False)
new_string2 = full_string2[len(cached_string2):]

new_inputs2 = processor(text=new_string2, images=[image2], add_special_tokens=False, return_tensors='pt')
# new_inputs2['attention_mask'] = torch.ones(1, past_key_values.get_seq_length() + new_inputs2['input_ids'].shape[1], dtype=torch.long)
new_inputs2['past_key_values'] = past_key_values

output3 = model.generate(**new_inputs2, max_new_tokens=1024, do_sample=False, streamer=streamer)
さらに詳しく
画像・テキストからテキストへのタスクに関する追加のリソースを以下に示します。
- Image-text-to-text タスクのページでは、モデルの種類、ユースケース、データセットなどについて説明しています。
- Vision Language Models Explained は、ビジョン言語モデルと TRL を用いた教師ありファインチューニングに関するすべてを解説するブログ記事です。
- TRLを使用してビジョン言語モデルをファインチューニングする方法を学びましょう